


So this project was pretty simple. It still took me a week to do it but I'm pretty sure it's just because I like the look of craft clutter all over the house.
Speaking of craft clutter I'm pretty much in love with my glue gun. Aaaaaand that was random.
So. I lugged a two-shelf bookcase into Cooper's bedroom a few weeks ago and found six baskets to fit inside. It was looking cute but plain. I thought some chalkboard tags on each basket would be a fun and easy little project to, you know, spice things up a little.
I hit up Michael's and found two packages of thin wooden rectangle things. (I was a bit of an eager beaver and started opening the package before I took a picture of it.)

They came in packs of four so I had two extras just in case I messed up. It has been awhile since I've used a power tool after all.

I used Alex's cordless drill to drill a hole in each corner of the wood.

Each hole was a half inch from either edge.

Once I had four holes drilled in one piece of wood, I used it as a template for all of the other pieces.

I thought it was pretty awesome when I found the section with chalkboard paint at Michael's and there were other colours besides black! Gotta love Martha.
They had some bright colours which would have been fun to use in a different room. However neutral-Jo (that's me) went with a medium grey to match the pewter and brushed nickel in Cooper's room.

I painted three coats of the chalkboard paint right onto the wood. Primer? Who needs it when you're lazy like me. Once the three coats of paint dried (with the help of my hairdryer) I conditioned the wood all over with a piece of white chalk. Instead of wiping it completely clean, I left a bit of chalk residue behind. To make 'em look used or something.

Next, I pulled out my roll of jute twine. Love that stuff. You know I can't do a project without it, right?

I fed the twine through the back of the first hole and left enough so that I would be able to tie some knots.
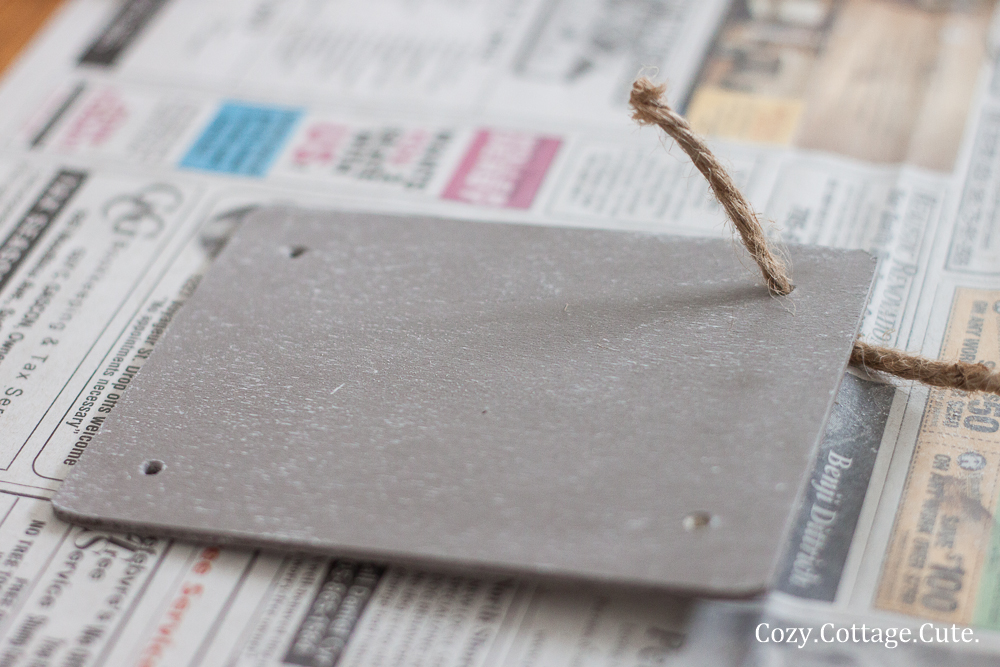
I tied two knots on the first end.

Now, here is the tricky part. I originally wanted to feed the back of the twine through the wood and through the basket to adhere the tags but the spaces in between the basket weaves weren't big enough. So, I fed the back of the twine through another hole and tied it off with another two knots.

I did the same on the other side so that I had four knots at the front of my wooden tag.

Then I trimmed the twine.

Finally, I practiced my primary printing and wrote some labels on the tags!

I forgot to take pictures of the last step but I whipped out my trusty glue gun and glued the tags right onto each basket. All I needed was some thin strips on each length of twine at the back. The glue comes off pretty easily if I ever get tired of the tags and want to take them off.


I was planning on getting a few more pictures however someone was finished pulling all the pajamas out of the bottom dresser drawer and came over to investigate.

I guess he wasn't impressed that the baskets were empty. Heh heh heh. :)
Sharing Here:
The Creative Spark @ Clean and Scentsible, Blog Link Party @ Somewhat Simple, Hookin' Up With House of Hepworths @ House of Hepworths, Fabulously Creative Friday Link Party @ Jennifer Rizzo, Treasure Hunt Thursday @ From My Front Porch to Yours, Feathered Nest Friday @ French Country Cottage, Inspire My Please @ Liz Marie Blog, Frugal Friday @ The Shabby Nest


I can't get enough of chalkboard tags these days! Your baskets and tags look so perfectly pretty and I love how they will keep all the toys in their place!
ReplyDeleteThank you so much Carly.
DeleteMy fingers are crossed that toys will be kept in their place but we all know the likelihood of that!
;)
Very cute!
ReplyDelete:)
DeleteLooks awesome!! I didn't know Martha had colored chalk board paint out - I'll have to check that out!
ReplyDeleteThanks Jenn.
DeleteThey had some pretty fun colours. Lots of possibilities there.... heh heh. :)
I didn't think the shelves of baskets were plain at all - until you added the tags. Then I liked it so much better!
ReplyDeleteHee hee, thanks Marti!
DeleteVery cute!! I recently started following your blog and just love it. Love it when your posts pop up on my google reader :-). Anyway I was wondering if you have a list of the paint colors you have used in your house? Love the color in Cooper's room and your living room? Do you know the brand and color name.
ReplyDeleteHey Angie!
DeleteMy list of paint colours is pretty short since the colours I have used are on several rooms!
The living room / dining room / sun room / kitchen / front entry are all painted in Benjamin Moore's Gray Owl but mixed at 1/2 tint.
The master bedroom / Cooper's nursery / upstairs hallway are all painted in Benjamin Moore's Old Prairie.
The striped room is Old Prairie + Camouflage by Benjamin Moore.
The breakfast room and powder room are Seagrass by Para Paints.
I hope that helps and I think you've motivated me to do a post about paint colours. :)
Super cute! You're much smarter than I am. When my little guy was a baby I put these adorable paper tags on the baskets in his room and as soon as he could crawl he ripped them all off.
ReplyDeleteWell, not that much smarter. Coops crawled over and had one of those knots untied in less than a minute.
DeleteBabies outsmarting their mamas. Who would've thought?!?
So cute and a great idea! Love it.
ReplyDeleteThanks Paige!
DeleteP.S. Your name is pretty.
Thank you Sarah for replying so fast!! Will look forward to your painting post!!
ReplyDelete:)
DeleteAlso I would love to know how your house always looks so neat and clean even though you mention messes?? :-). I have two young boys and they keep me hopping and my house is impossible to keep as lovely as yours!! Also I love the arrangement of your living room!!
ReplyDeleteHahaha, maybe I'll have to devote a post about that too.
DeleteIt won't be a post about how my house is so tidy it will be a post about how to strategically take photos around the messes.
Seriously though.... to the right of that bookcase was a pile of diapers that I dumped out of one of the baskets onto the floor because I only had five minutes to take the photos. There was also a pile of baby pajamas and books all over the floor that Cooper emptied while I was doing my "photoshoot". Trust me, there are messes. Many, many messes. :)
He's adorable, love looking at the pics you take of him. Love the bookcase to and those little chalkboard labels certainly dress it all up!
ReplyDelete:)
DeleteOMG how did that baby get to 11mths old...seriously time flys. I have the same baskets and made the same type of tags for my baskets in my kitchen. I did have trouble working out how to tie the tags to the baskets but hey...the glue looks good. For anyone else who is into scrapbooking and owns a "crop-a-dile" or it might be called a "crop-o-dile" I used this to make perfect holes in my little bits of wood instead of a drill.......sooo much easier and very accurate just like a hole punch in paper basically.....it looks fantastic in the grey colour. Regards Kathy A, Brisbane, Australia
ReplyDeleteThat crop-o-dile thing sounds awesome!
DeleteYou've got me curious... how did you end up tying the tags to your baskets???
:)
Love.Love.Love!!Few questions, first, where'd you get your baskets? Love them! Second, wall is it a scentil or free hand? Love that too! I am so going to Michaels tomorrow (30% day too- woo-woo ;) ) and getting some martha chalkboard paint and labels!! Thanks for the idea!
ReplyDeleteHey Jennifer!
DeleteThe baskets were all from The Great Canadian Superstore in their home décor section.
The wall was done with a wall stencil from Royal Design Studio! There is NO WAY I would be able to freehand something like that.
:)
Good luck with your chalkboard tags!
Very cute (the tags and the Coopster.) I'll have to check Superstore here for the baskets.
ReplyDeleteThank you. :)
DeleteSuperstore also has matching magazine baskets that are perfect for files. I scored three for a future little organization project..... :)
Love these, we literally bought baskets like this at the weekend. This is such a great way to label them. Will just have to find similar wooden things over here.
ReplyDeleteMe again! Just wanted to let you know that I will be featuring these at Clean and Scentsible tomorrow. I checked our Michaels for that chalkboard paint color - only a fairly bright blue, green and black. :( I'll have to keep looking! Hope you are having a wonderful weekend!
ReplyDeleteJenn :)
I turned to Pinterest for help in finding tags for the baskets in our new homeschool room. Voila! Your project came up, and it is exactly what I was looking for. Thanks for the inspiration.
ReplyDeletethank you for sharing i used my ikea baskets my twine i already have and skipped over to michaels to find tags. thanks for posting picture of package by the way i had some chaulk board paint laying around from previous project i went to work on my exciting project and i love how it turn out. thanks
ReplyDelete