Cinnamon Roll Muffins

24

Saturday, March 31, 2012


I woke up this morning with an urge to bake some sort of yummy treat. I looked at a few cinnamon bun recipes but was too impatient to do the whole dough-rising-all-day thing.

Translation: hungry for sugary breakfast. 

I headed over to Foodgawker to see what I could find. What I did find was a delicious looking recipe for Cinnamon Roll Muffins. The instructions were simple and the baking time was only 15 minutes - I was sold.


Cinnamon Roll Muffins
Recipe Source: The Comfort of Cooking
Makes: 12 Muffins

Ingredients:

1 cup buttermilk (I used 1% milk + 1 tbsp vinegar)
1/2 cup brown sugar
1 tsp baking soda
1/2 tsp salt
1/2 tsp vanilla
1 egg
3 to 3-1/2 cups flour (I used 3 cups)

Filling:

2 tbsp butter, room temperature
2/3 cups brown sugar
3/4 tsp ground cinnamon

Icing:

1 cup powdered sugar
1-2 tbsp milk or cream


Directions:

1. Preheat oven to 375° F.

2. Measure the brown sugar, baking soda, salt, vanilla and egg into a mixing bowl. Add the buttermilk. Add the flour. Stir until thoroughly combined.

3. Turn dough out onto a lightly floured surface and knead for a minute or two. Roll the dough into a 12-inch by 24-inch rectangle. Using a rubber spatula, spread with butter. Sprinkle with sugar and cinnamon.

4. Roll the dough into a log and stretch slightly. Cut into two-inch pieces and put the pieces into greased muffin tins or muffin tins lined with cupcake papers.

5. Bake for 15 minutes, or until golden brown. (Mine were ready after 13 minutes.) Allow the muffins to cool for 5 minutes, and then remove from the muffin tins.

6. Drizzle with icing (if using).


Note: Eating two in a row might cause you a bit of a belly-ache.
That's how rich and gooey they are. :)


25 Things

18

Wednesday, March 28, 2012

1. I really want to bake a chocolate cake. Not for guests. Not for a special occasion. Just for me to, like, eat.

2. I really want to bake a chocolate cake alllllllll because of Pinterest. Doesn't this picture look absolutely scrumptious?!?
Image: Pinterest
Original Source: Real Simple

3. I just read a post on someone's blog about pet peeves and it was hilarious. One of mine? People who chew weirdly, loudly, or with their mouths open. Ugh.

4. I think we've settled on a name for Lil' Ninja. We're not officially announcing it or anything yet but we're close to making a final decision. Although we could change our mind once we see his smushed little face and decide that he looks more like a "Fred" or "Harold".... you never know.

5. I have no idea how I lived almost my whole life without ever tasting tzatziki sauce. The name sounded weird so I always assumed it would taste gross. It just might be my favourite thing right now. We're about to eat it some on grilled chicken and cucumber flatbread sandwiches for supper tonight. Yummers.

6. I entered my little numbered dresser in Whisperwood Cottage's contest for a feature in Cottages and Bungalows magazine. It was chosen as a "finalist" out of 200 entries. I was so giddy and wanted to win SO BAD! Alas, it did not win. I was so close to becoming famous. Bahahaha.

7. I have recently discovered that I was not cut out for stenciling entire walls. More details on that to follow next week. :S

8. Alex bought me pink and yellow roses the other day. What a sweetie pie. They were pretty. And they smelled good.

9. One of my friends (xoxo) lent me the Twilight series over a year ago and I haven't read them yet. I saw the first movie and the part where the guy gives the girl a piggy back right up the tree at the speed of light??? Really??? But my friend has really good taste in girly shows, clothes, shoes, and purses so I'm going to take her advice and read the series. Soon. 

10. I only have two days of work left. I cannot tell you how excited I am about this. The countdown to my new life of joggers and soap operas is on.

11. I am slightly (okay alot) afraid that I will love my new life of being a stay-at-home wifey and mama so much that I will never ever want to go back to work.  

12. I love DIY projects, furniture refinishing, and all the little crafts n' things that I've done on this little blog. I just want to make sure that I don't start doing a zillion "crafts" just for the sake of having posts to publish. I really don't want a basement full of 5000 wreaths for every occasion under the sun. I also don't want to feel like I have to paint a piece of furniture to "reveal" every week. I'll just keep blabbering on about curtain rods and picture frames with an occasional craft here n' there and maybe, just maybe, you'll stick around anyway.

13. The generosity and kindness of people amazes me sometimes. I've had the sweetest emails lately from readers just saying hi, commenting on how they like my site, or offering to mail me white picture frames, pie plates, and vintage tart tins. (Thank you so much btw, you are all the awesomest).

13. Al and I went to see 21 Jump Street on opening weekend and the line was so long to get into the theatre that we had to stand outside and around the corner. I'm not ashamed. It was sooooo funny.

14. Alex and I can't share popcorn at the movies because (he's going to kill me when he reads this) he is a total popcorn hogger. He shovels it in like it's the last food he'll ever eat in this lifetime. We do two bags now: big one for him, mini one for me. It drives me crazy but I kinda love it about him at the same time.

15. We both have a theory that movie theatre popcorn butter is actually melted Crisco. What do you think?

16. Some decorating trends kind of annoy me. And decorating/blogging terms, too. Like "mood board". And "vlogging".

17. I once thought it would be fun to skateboard down one of the steepest hills in the city. I wasn't a good skateboarder. I fell. Someone from school just happened to be driving past when I bailed. It was a great story at school the next day. Not.

18. I am loving the children's author Oliver Jeffers. If you haven't seen or read any of his books you just have to! They are adorable. I'm thinking about framing some of the illustrations for Ninja's nursery. It's on the list.

19. I want to live in this music video: http://www.youtube.com/watch?v=UkOKCWDJ4iA

20. I'm writing this post because I made it a goal of mine to post more often but don't really have any projects done at the moment. That's okay because your comments on these posts are always so funny!

21. I bought winter boots for the first time this winter. I hadn't owned a pair since I was a kid! One of the best purchases ever. I didn't have cold feet ONE TIME this whole winter. Whoever invented boots was a real genious.

22. Giant preggo bellies really get in the way of wearing pants. Even the stretchy ones are really uncomfortable. Could I get away with wearing no pants for the next 4 1/2 weeks? Please?

23. I still want to bake a chocolate cake.

24. I still want to eat chocolate cake.

25. Chocolate cake. Chocolate cake. Chocolate cake.

;)

Lounge Chairs for the Deck

14

Sunday, March 25, 2012

If you're getting sick of me going on and on about decorating Little Dude's nursery, then you might like me again after this post. :)

We've been in our house for about six years now, and since the day we moved in I wanted a deck in the backyard so very badly. It was a huge project for Alex but he was able to get most of it completed by the end of last summer. (We still have finishing details to add such as stairs and skirting.)

If you're new around here you can check out the two previous posts I wrote about the deck here:


We chose a two-level design to create two distinct areas: one for eating and one for lounging.

(This picture was taken last summer.)

(This picture was also taken last summer.)

The tricky part has been finding outdoor furniture to actually use for each space. So far we've been using those plastic muskoka chairs that you can get at the hardware store for about $10 apiece. 

My inspiration pictures were these ones from Pottery Barn. Soooo nice but we all know...... soooooo expensive.

Image: Pottery Barn

Image: Pottery Barn

I knew I wanted a similar look but didn't want giant, deep cushions. I wanted people to be able to sit on the furniture without cushions if they had to. I also didn't want a zillion cushions to worry about storing every time it rains or is windy, etc. We live way up North, remember?

They have lots of mega-expensive sets at a few places around town like Sears and Home Depot. But with everything else going on, we just don't have the money to spend $1000-$2000 on outdoor furniture that we can only use for four or five months out of the year. 

Lowes has a new set this year called the Severson collection. It's an outdoor wicker set of two lounge chairs, a loveseat, and a coffee table for $298. And it's CUTE! And it's well-made. And you can sit on the chairs without a cushion! And they're the right colour! 

And...... they're in my backyard this very second!!!

We bit the bullet and brought the set home last night. They're still packaged up because I wanted to make sure that I really liked them before we decided to keep them.

Here they are:

We got four of these chairs.

We got one loveseat.

And also the matching coffee table. "ALEX!!!! You have something to put together!!!!!!"

They did have thin little cushions at Lowes that were sold seperately but I want to see if they have any cute ones at Homesense first.

I'm so excited that we'll actually have some "grown-up" furniture outside on our deck this year. Yeah! Now you can come over and read magazines / eat sunflower seeds / sip fruity drinks in the sunshine with me. Ooops, I almost posted my address on the internet. I'd better not though, I don't want anyone sneaking in the backyard to steal my new chairs! Hee hee.

Framed Alphabet Cards

12

Saturday, March 24, 2012


I had to change up my original plan for displaying this set of alphabet cards. Since there were 26 different cards (all adorable), I wanted to make sure I displayed as many of them as possible.

I've seen lots of pictures around the web and on Pinterest of whole sets of alphabet cards adhered straight to the walls in neat little rows or displayed on hanging wires with clips (thanks for all of your suggestions, btw!!!). However....

a) I really wanted the polished look of a set of matching gallery frames
b) The room is too small to display the whole set of 26 cards
c) I wanted to surround the colourful cards with large white mattes and frames to tone them down a bit and make them go with the neutralish room

In this post I mentioned that I decided on a set of six frames over the crib but that my lousy town didn't have six matching white frames anywhere. Booooo. Here's how they were kind of supposed to look:


{Yes, I know that the bottom row of frames would be kinda low for little fingers but hey! it's all in the name of looking cute, right?}

I ended up driving to Wal-Mart to see if they had any white frames since I hadn't checked there in a long time. It turns out they did, and there were even some frames that were bigger than the ones I had originally chosen.

I finally decided on using three very large white frames instead of six kind-of large frames.


We thought we could make use of all the cards by switching them out every few months. The first set we chose spells d-o-g. Get it? 'Cause we like dogs???? Yeah, we're nerds.


 Alex has been making fun of me for the last two weeks that picture frames can get me so stressed out. What can I say? I am kind of obsessed with little details. 

Here's another picture although I'm trying not to show you the adjacent wall or the crib just yet........


I know it's not much progress but it's a little bit. At least I can cross something off of my massive to-do list for the room. :)

The next three items on my list:

- finish sewing crib skirt
- finish stenciling accent wall
- buy and install curtain rod

Hope you have a fun and productive weekend. Check in tomorrow if you're lazing around surfing the net because hopefully I'll have some more pictures for you.

P.S. The alphabet cards were purchased from Chapters for $34.
P.S.S. The frames were purchased from Wal-mart for $20 each.
P.S.S.S. The size of each frame is 15" x 19" (with an 8" x 10" opening).

:)

Three Crown Molding Ledges

8

Sunday, March 18, 2012


I'm happy to share that we got our three crown molding ledges installed this weekend although I can't say it was fun or easy. {Insert expletives here.}{Unless those offend you, then pretend I didn't just write that.}

I was super stoked when I first found these 3.5 foot ledges at Michaels a few weeks ago. Pottery Barn has some similar looking ones in a creamy antique white for around $85 per ledge. The ones I found at Michaels were pure white and with a 40% off coupon used for each one, about $26 each. Not bad at all. Or so I thought.

I thought it was kind of awesome that on the back of each cardboard box, there was a full-sized image of the shelf to cut out and adhere to the wall to help with the installation. The cut-outs even had drill-holes that showed you exactly where to put the screws in the wall! Brilliant!

I cut out the templates and moved them around on the wall until I figured out a spacing of 14" in between each shelf. I thought this left enough room in between to lean some decent sized pictures (and trinkets of course). I also centered the three shelves in between the edge of the wall and the edge of the door.

Here is my original layout:


After uploading the above picture on my computer, I realized right away that the top shelf was too high and would look out of whack with any tallish items placed on it. So I ended up shifting each shelf down exactly five inches from where they were in the picture above. 

I measured each shelf perfectly making sure they were evenly spaced and everything was level. I called Alex for what was supposed to be a five minute job to drill holes where the arrows were, add some screws, and hang the shelves.

Except after installing the first set of screws, we realized that they didn't match up to the brackets on the shelf. The template said, "DRILL HERE" but really the brackets were an inch to the left of where they were supposed to be. Weird.

So then we checked the next shelf. The drill holes on the template also did not match up to the actual brackets on the shelf. But this time they were 1.5 inches off. Huh. Very weird.

So then we measured the last shelf. The drill holes on the template again did not match up to the actual brackets on the shelf. But this time they were 1.75 inches off. 

The brackets were in different spots on every.single.shelf. and none of them matched the template that was provided on the back of the cardboard box. What was supposed to be a five minute shelf install actually took us about an hour and a half to complete. Alex still likes me. Sort of. 

After all the drama, here's how they look:


We do realize that the bottom shelf is at perfect level for little fingers to reach once Little Ninja starts gettin' mobile. On our to-do list is to replace the wimpy brackets on all of the shelves with some heavy-duty-secure ones so that all the shelves stay put and don't go falling on any little heads.

Despite the setbacks, I really do like how the shelves look now that they are up. Once they've been prettied up with some books, pictures, and a few cute toys and thingamabobs, I think they will add quite a bit of interest to a boring little wall that had no room for furniture.

And now, mission critical is........ finding some cute books, pictures, toys, and thingamabobs!

Ooooh yeah. My favourite!

Lighting Indecision, White Gallery Frame Woes, Blog Housekeeping

22

Friday, March 16, 2012

Good morning friends. I hope you're having a b-e-a-u-tiful week so far. I'm supposed to have about five different projects done by the end of this week but it's been slooooow going (as always). 

I think I have a bit of apprehension to start two of the bigger projects (wall stencil + bean bag chair) because I'm worried that they won't turn out. It's a silly attitude to have but I kind of get frozen by fear of failure. I've got three days left before back to work, though so it's crunch time!!!

{Insert pep-talk here.}

In other news I had to go and pre-register on the hospital yesterday. All of a sudden this baby thing is starting to get way real. Ahhhhhh! Panic!!!!!! I don't have any diapers or strollers or bottles or anything practical yet. What I do have is a tiny little numbered t-shirt that I picked up on sale last night for Little Ninja. I'm so good at priorities aren't I?

And, some more random stuff. 

Blog Housekeeping

I've been playing around with my Photoshop skillz the last few weeks, trying to get the hang of making those inspiration board things. I was also getting tired of my old blog header so I decided to start playing around with a new one this week. I really have no idea what I'm doing but with a little help from Alex here's what I came up with.

Before:


After:
It's not perfect and definitely not very fancy but I'm pretty happy with my novice skills so far. Which one do you prefer, old header or new header?

Also, I had no idea that with the new followers gadget, Linky Tools, you have to update your own posts?!? I read that somewhere and had no idea. Can anyone shed some light for me on how to do this? Kind of strange if you ask me.

Also, also, are blog Facebook pages really necessary? I created one this week but it looks so ugly! Does it connect more people or is it just a waste of time?

White Gallery Frame Woes

I've mentioned my frustration on this topic before, but I just have to vent again. My plan for Ninja's nursery was to have a gallery wall of framed alphabet cards.

I wanted at least six large frames or eight smaller frames. You can see where I was testing this out yesterday:


However, this town is so frustrating. There are only TWO places that sell white picture frames off-the-shelf: Michaels and Chapters.

The Michaels ones are cheaper quality so I went to Chapters yesterday to get my six large frames. They only have four. They are out of stock and cannot tell me if they will be getting more in. They also cannot tell me if they can order any more. They also do not order stock from other Chapters locations. Seriously!??! What kind of business is that!?!?!?!?!??!?!?!?!?!?

So, I headed to Michaels instead. They have some newer gallery-type frames and they were on sale to boot. Except the mattes on the Michaels frames don't quite cover the corners of the alphabet cards. So I need double mattes for them. Except they only have TWO mattes on the shelf and won't order any more because the computer says there are ten in the store when there are clearly not. What kind of business is that!?!?!?!??!?!!?!?!

So now I have no frames to frame my alphabet cards and that was one of the easy projects I was supposed to get done this week.

My options now are 1) a 4-hour road trip to Ikea or 2) buy some cheap Wal-Mart frames and spray-paint them white. Booooo and boooooooo.

Woe is me.

Lighting Indecision

With only six weeks left until Little Ninja jumps on the scene, I need to choose a light for his nursery. I've been going a little crazy with the purchasing lately so it's not in the budget to order a fancy-schmancy one online. 

Here were some of my ideas:

A) Oil-Rubbed Bronze Semi-Flushmount by World Imports - From Home Depot
We purchased a similar one for our bedroom from Lowes (which was on the small side) but I think this one is a bit bigger. It's cute. Cost? $52

B) Hampton Bay Morovian Star Pendant - Home Depot


I love the idea of this light in a nursery, however the Home Depot version is a pendant light which means it would hang down a bit in the centre of the room. I think I'd only use one or two chain links but it's still a pendant light. Alex isn't a fan of this one but I think it's pretty cute. Cost? $150

C) Steel Polyhedron Pendant - Homesense


The above picture is a fixture from Restoration Hardware Baby (priced at $400). It's kind of funky. I found an almost exact replica at my local Homesense store and brought it home to try it. Holly from In the Fun Lane used it in a little nook off of her kitchen and it looks really cool (see her post here). However when I brought it home, it just looked weird in the teeny tiny room up against the ceiling. I still have it but haven't returned it yet. Cost? $79

D) Good Earth Semi-Flushmount - Lowes
I came across this post by Chris over at Just a Girl. She just installed this linen-look drum shade in her craft room. I really, really like it! I thought it might tie in with the circles in the stencil that I'm going to use on the accent wall in the room. Plus, it's close to the ceiling and very neutral. I think this is my favourite choice at the moment, although I've heard it's really big. Cost? $84 

-------------------------------------------------------------------------------------------------------

So, I'm really needing your advice today. Please pretty please click on the link at the bottom of this post that says "Leave a Comment". You don't have to have a blog to do it, AND it can even be anonymous. You can even scold me for not buying practical things for Little Ninja if you really want to. I won't be mad.

P.S. It's sunny here today and the snow is melting off of our deck. Yeah!!!!

P.S.S. I really feel like an english muffin with cheesewhizzzzz but we don't have any english muffins left.

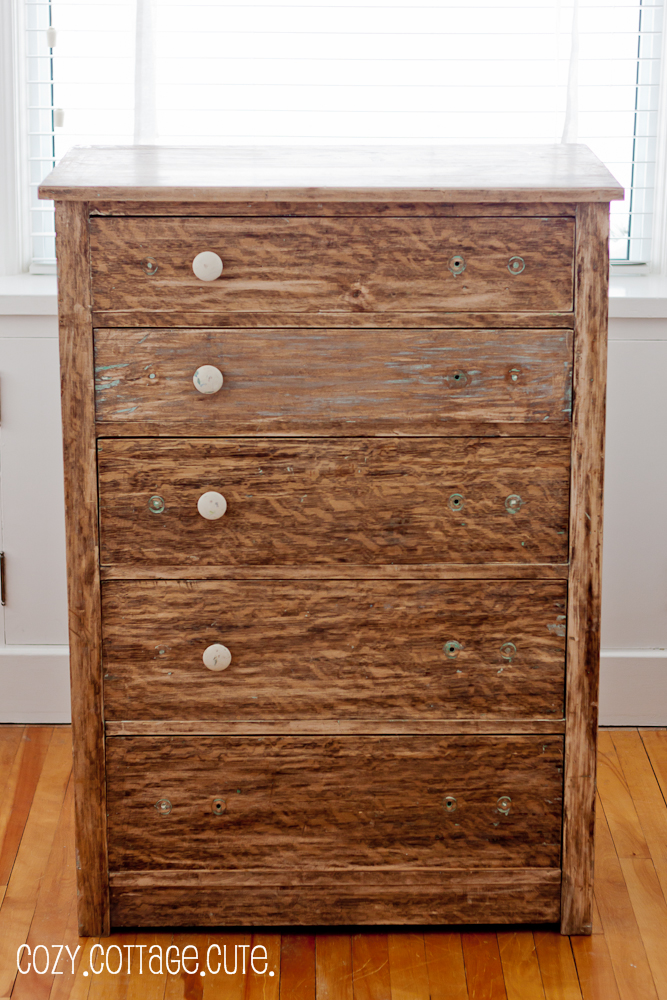
P.S.S.S. Thank you so much to everyone who left sweet comments on my last post (Numbered Dresser).

P.S.S.S.S. Bye!

Numbered Dresser - Before and After

42

Monday, March 12, 2012


I'm a day past my self-imposed deadline but that's okay because the dresser for Little Ninja's bedroom is finally, finally, finally done.  

Happy dance!

I feel so relieved that little dude now has a stash for all of his mini hoodies. (He only has one hoodie so far but I've still got a few weeks to build a collection.)  ;)

Back to the dresser.

I originally bought the dresser almost three years ago at the Christie Lake Antique Show. It was old, it was crusty, it was only $90. I loved the size, shape, and style so I didn't think twice about bringing it home. Except it sat in our basement for way too long gathering dust and taking up space. See, it had quite a few layers of old paint already, all crackled (which I kind of like) but the base colour was a hideous hunter green which just had to go.

A few weeks ago my awesome dad offered to strip the paint off for me so that I could finally get it ready for the baby's room. Here's a photo of the dresser after all the paint was stripped off: 


I knew I wanted the dresser to be white, but I also wanted to add a little bit of interest and depth so I did a two-colour paint finish. I'll explain in the step-by-step tutorial below:

1. Remove Old Paint

We did this step for a few reasons although you don't always have to strip the old paint off before repainting old furniture. There were too many layers of paint, there were deep cracks in the top paint layer, and I wanted to get rid of any yucky old paint in case Little Ninja decides to chew on this dresser at any point in the future. My dad used a heat gun and a metal scraper to remove all of the old paint layers. He did this in the garage with the doors open for ventilation.

2. Sand

Before priming the dresser, I gave the whole dresser a very light sanding by hand with some fine grit sand paper (150 grit). I then wiped it down with a damp cloth.

3. Prime

I usually prime furniture with Benjamin Moore's Fresh Start Primer, but I ran out. On a routine trip to Home Depot I picked up a different brand instead. It worked fine.

4. Paint With Base Coat Colour

I chose to use grey as the base colour for the dresser. This is the colour that I wanted to show through underneath the white after sanding and distressing. I chose a very light grey (leftover 1/2 tint Grey Owl just because I had a bunch leftover from painting the living room / dining room). It is a soft, neutral colour that I know will go just about anywhere in the house. I painted this coat with a brush for all of the crevices and a foam roller for the flat surfaces.

5. Paint with Top Coat Colour x 1

Once the grey paint coat was dry, I painted directly over it with my top colour: Cloud White by Benjamin Moore. I chose an eggshell finish to make sure it was a bit more durable (I still don't like using pearl or semi-gloss paint on furniture even though that's what the paint store always recommends).

6. Paint with Top Coat Colour x 2

Once the first coat of white was dry, I painted a second coat of white on top. It just looked better that way.

7. Sanding & Distressing

When it was time to scuff up the freshly painted dresser, I went back and forth between using an electric sander and sanding by hand with 100-grit sandpaper. The sander worked really well on the top of the dresser and the drawer fronts. The side panels were so small that I used the sander and a sanding block by hand. 

8. Add Hardware

The dresser already had holes pre-drilled for drawer pulls / handles. I found some 3" industrial-looking pulls at Home Depot for about $5 apiece. Ouch, I know. Don't tell anyone that I spent 50 bones just on the handles. I also wanted to add a little something fun since the dresser would be going in the nursery. I really like the look of numbers on dresser drawers but I decided against stenciling numbers directly on the drawers. Instead, I found some adorable "house numbers" at one of our local hardware stores (Canadian Tire). They have a stick-on backing so they can be easily removed if I change my mind or decide to use this dresser somewhere else one day. 

And, the best part. Photos!

Can you see the grey paint showing through?

Brushed nickel 3-d numbers. So cute!

Boyish looking drawer pulls.


Hopefully Dude'll learn how to count to five after staring at this dresser all the time.

The after picture.

So, what do you think? Do you like it, do you like it, do you like it? It definitely fits in with the vibe I was going for in the room. Old / new / modern / country / industrial / fun. Uhhhhh, does that make sense?  

And here's a before and after comparison shot since those are always super fun:


Sharing Here:

Metamorphosis Monday @ Between Naps on the Porch, Craftomaniac Monday @ CraftO'Maniac, Creative Bloggers' Party @ Homemaker On a Dime, Tip Me Tuesday @ Tip Junkie, Get Your Craft On Tuesday @ Today's Creative Blog, Tutorials and Tips @ Home Stories A to Z, Piece of Work Wednesday @ Primitive and Proper, Tuesday's Treasures @ My Uncommon Slice of Suburbia, Furniture Feature Friday @ Miss Mustard Seed, Frugal Friday @ The Shabby Nest

,

What I've Been Working On + My Dogs Are Cute

9

Saturday, March 10, 2012


The above picture is a little sneak peek of the dresser I've been working on. I'll share all the details when I finish this sucker tomorrow.

See that? I'm giving myself a deadline. Hold me accountable, k?

In my mind I can do projects a lot faster than in real life. Why am I soooooo sloooooooow???? I thought I'd be finished this dresser by now but I'm not. I don't think stopping every two minutes to get a snack and check my email help in the productivity department.

In other news, my dogs are cute. I really wish they didn't always look so forlorn though. Especially when they are so darn spoiled.


P.S. I've been trying to convince myself that it's spring/summer by making toasted cucumber and tomato sandwiches for supper two nights this week.

Oh no. I just made myself hungry by typing that. Gotta go. ;)

Nursery Plan Part 3

10

Thursday, March 8, 2012

Hey Girlies (and the one boy who reads this)(oh wait, it's Alex).

Sorry I haven't been around the last few days. I've been busy 1) watching a new teeny-bopper show (I'm too embarassed to tell you what it's called) and 2) going to bed at 8:30 p.m.

The most super-amazing news of all time is that tomorrow is my last day of work before the March Break. 

Oh, nine days of lazing around I love you so much already!!!!!! I love you and want to marry youuuuuuuu!!!

I will thoroughly enjoy a week of rest and relaxation (a.k.a. working on Little Ninja's room) but I am a wee bit jealous of my teacher friends who are all going on tropical vacations next week. Silly me chose getting our floors refinished instead of sun and beach sand. It sounded like a good idea at the time..... wah wah wah. ;)

{Note: I still do like the floors, though.}

I did work on priming and putting the first coat of paint on the dresser for Little Ninja's room this past weekend. I didn't finish it yet but I'll make sure to share some pictures when it's all done.

In the meantime, here is my little plan for another wall in the baby's room. It's another tiny wall. If you've noticed a trend this room is teeny, teeny, tiny, tiny.


Again, I just might be trying to cram too much stuff into one space, but here goes.

Plan for Wall #3


1. Four / six white gallery frames over the crib. They have some really nice ones at Chapters but they also have some new cheaper version ones at Michaels. Haven't decided if I'm splurging on these or not yet.

2. A cute mobile. Those are essential, right? The above-pictured one is the Transportation Mobile from Pottery Barn Kids. It's painted metal cars n' stuff. Adorable. Although it's got a hefty price tag so I might craft up my own mobile.

3. Alphabet flashcards to frame in the four / six gallery frames over the crib. I already purchased the above-pictured ones from Chapters last weekend. I love them!

4. Eli's Elephant Nursery Bedding, also from Pottery Barn Kids and also already purchased. I'm making progress!

5. White Straight-Up Crib from The Land of Nod.

In case you missed my little plans for the rest of the room, here they are too. Hopefully everything will jive well together without looking too matchy-matchy or too random. I'm nervous! I want it to be the perfect little room.

Plan for Wall #1:


Plan for Wall #2:


My goal is to finish the following projects by the end of next week:
  • Repaint / distress / add hardware to dresser
  • Order curtains
  • Install 3 crown molding ledges
  • Sand / add casters to antique crates
  • Frame and hang 6 alphabet flashcard pictures
  • Stencil wall #4 (I'll share my plan for that wall soon, too)
Eeek, that's quite the list already....... :)

How 'bout you? Are you off on the March Break? Where are you going? Whatcha doin?

P.S. I've been playing around with Photoshop trying to make those little inspiration board things. Not perfect but I'm getting better I think!

Nursery Progress: A Crib and Some Bedding

13

Friday, March 2, 2012

Dude needs a place to sleep!

So we made it mission critical to choose and order a crib and some bedding.

Choosing.Is.Hard.

I knew I wanted a white crib with a simple design. I finally narrowed it down to this one:


I chose this crib in particular because I really liked the simple design, the colour is a crisp white (as opposed to the creamy antique white at Pottery Barn Kids), the price wasn't too bad, it's made out of solid wood, and it had really good reviews.


We had to order it from the States though. The shipping quote they gave us wasn't all that bad, and the cost of everything worked out to be the same as the cost of a fancy-shmancy crib at our local Babies R Us. So we went ahead and ordered it.

Alex put it together and while it looks great, it also looks GIGANTIC in that teeny tiny bedroom. I just might have to re-evaluate my original furniture placement plan.

I'll show you a pic soon, k?

We also had to decide on some crib bedding. I was looking for a quilt and some crib sheets that had some soft colours. I also wanted the bedding to go well with the wall colour that I had already chosen. It was hard to find anything with a greeny-grey but finally I found this set:


Simple and cute, just what I like. The greens in the bedding go nicely with the wall colour of the room without looking too matchy-matchy. Just what I was hoping for!

It's called Eli's Elephant Nursery Bedding and we found it at Pottery Barn Kids in Toronto.

We got the quilt, the bumper, the sheets, and a little pillow. (Apparently bumpers are bad now, though? Huh???) I wasn't a fan of the crib skirt so I'll have to find a different one from somewhere local.

I'll take a picture of the crib with the bedding as soon as I have a chance. I gotta jet though 'cause after a challenging work week for both of us, we're off for a dinner and shopping date. Oh yeah, baby!

Happy Friday! P.S. What are you up to this weekend?
Related Posts Plugin for WordPress, Blogger...

Cozy.Cottage.Cute. All rights reserved © Blog Milk Design - Powered by Blogger