Colorful Raindrop Accent Wall in the Nursery

41

Monday, February 29, 2016


I am so excited to share my latest little project with you - a colorful raindrop accent wall in Winnie's nursery!

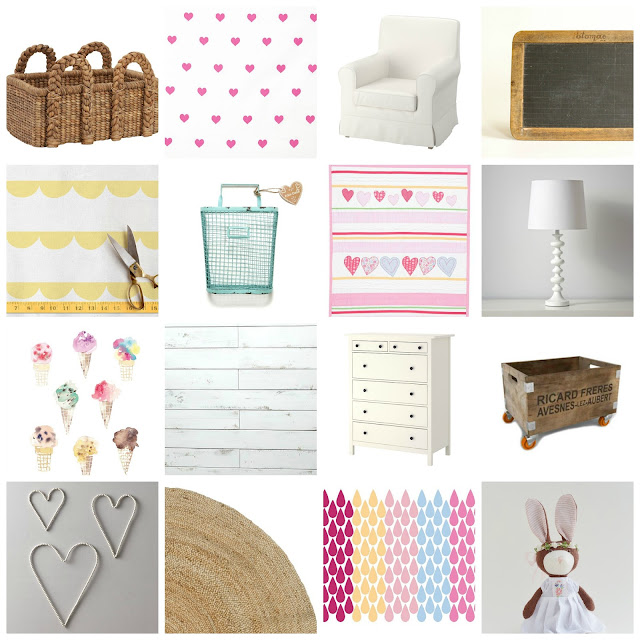
A few weeks ago I shared my general plan for the room:


At the time I had just placed a custom order from the Etsy shop 'Leen the Graphics Queen' for some colorful vinyl raindrops. I really wanted to use her shop since I had heard great reviews. At the time they didn't have any raindrop wall decals so I sent an inquiry with the following inspiration picture and a size request of 3" x 1.5" for each raindrop. Whaddayaknow she whipped those up in no time flat and they were perfect!

Raindrop Inspiration Picture - The Lovely Wall Co.

The first thing I did when I received the wall decals was to cut them all out. Each of the five colors came on a solid sheet. I knew I wanted to play around with the pattern / spacing of the raindrops before committing for good. Once they were all cut out I taped up a test area that I shared on Instagram. 


My sometimes helpful husband (okay he was a lot helpful this time) came in and took a look. He did the math and figured out that if I spaced the raindrops as close together as they were in the above picture, that I wouldn't have enough! I ordered 125 raindrops - 25 of each color. So, I started again trying to fit about one and a half raindrops per square foot. I got to work taping them up using a random pattern and random spacing. 

Here is how the wall looked before I got started.


I started (the second time) in the upper left corner and worked my way down and across.


Every once in awhile I would take a step back to see how it looked. Sometimes I had to tweak the spacing between the raindrops as I kept making the gaps smaller as I went along. Whoopsie!


Alex was a dear and entertained the kiddos while I worked. Drinking coffee and taping up cute raindrops is great way to spend a Sunday afternoon by the way. After a few hours of taping, tweaking, peeling, and then sticking..... here is how the completed wall looks!


I kind of love it.


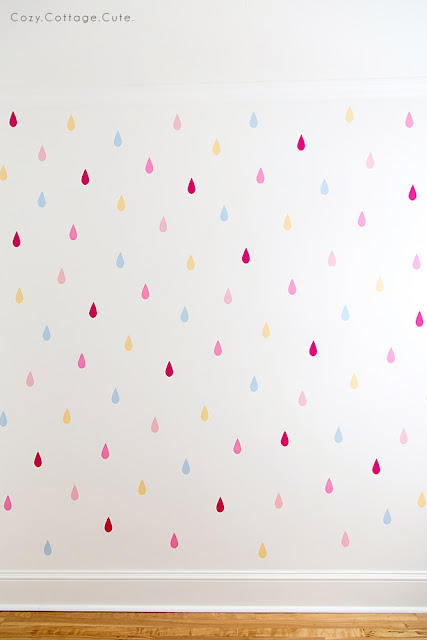
The room is really, really tiny. I had to smoosh myself against the back of the opposite wall and use my wide angle lens to get the whole wall in one picture.


I need to stop looking at these pictures though. I keep seeing little areas that need additional tweaking. A color switch here, an inch to the left there. I really need to make a limit for myself - only five more adjustments allowed! Dear OCD: Simmer down - it's supposed to be random!

I was hoping for a light, airy, whimsical, cottage vibe in this room. I think I'm headed in the right direction. What do you think?!?!?

:)

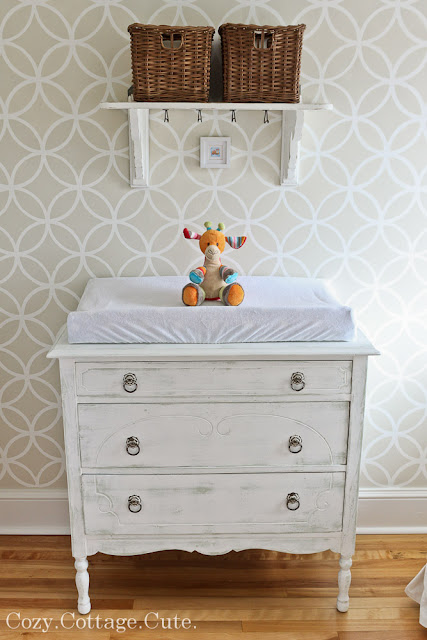
P.S. I really did love the stencil that I did on the same wall a few years ago when it was Cooper's nursery. However, Alex didn't love sanding the wall for six hours before repainting. I think both of us are very happy that this little accent wall can be changed up a little more easily this time!

P.P.S. I had ONE raindrop left. How's that for luck!

Sharing Here:

Inspire My Monday @ Sand and Sisal
Made By You Monday @ Skip to My Lou
Tutorials and Tips Link Party @ Home Stories A to Z
Silver Pennies Sunday Link Party @ Silver Pennies

The Fixer Upper - Grey Siding After Pictures!

4

Sunday, February 28, 2016


Remember our Fixer Upper?!?!?

Remember the falling-apart front porch and mint green siding? I just realized that I never ended up sharing some after pictures of the place with a new front deck and new grey siding. 

(We looked at our options for siding color in this post and I shared a sneak peek of the siding being installed in this post.)

If you are a new or new-ish reader (hi! wink!) we purchased the ugliest, most ghetto house of all time one street over from ours. Alex's parents live there and provide us with a tonne of free baby and dog sitting services. They also grow vegetables in the backyard and deliver them to our doorstep. Obviously it is an awesome set-up. Hee hee!

Here's how the house was looking when we took possession. It was partially renovated by some people who were going to flip it. They had already opened up the front porch (it was enclosed) and replaced all of the windows.  


Alex and his dad fixed the porch roof, added some new posts, and built a solid new deck. We still have plans to stain the deck boards and add white railings and posts. For now though, it looks so much better!


The boys had a tough time installing the siding. On a hundred year old house, you can bet there was not an inch that was level or square. They worked really hard and finished it off this past summer. 


Alex's dad is really creative with reusing materials so he took all of the broken curbs and built a little planter wall for some hydrangeas. I'm fairly certain that every house needs to have hydrangeas all along the front.

;)

Isn't it looking great? I think the white railing, white posts, and possibly some white shutters will really finish off the front. 


P.S. The siding was purchased from Roofmart and the color we chose is called Harvard Slate. I'm really happy with our choice!

P.P.S. Winnie is up early from her nap (boo hoo) so I've gotta run, literally. That girl is on the move. :)

Winter (Blech) & Picture Overload

10

Tuesday, February 23, 2016


Hiya. How've you been? We've been trying to beat the winter blues. It seems like e-v-e-r-y-o-n-e we know is packing up and heading somewhere hot and sunny within the next few weeks. We'll just be staying put here in Northern Ontario - putting our snow-pants on to go anywhere and trying not to get frostbite on our faces. What can I say..... I'm a wimp. I hate being cold! I am literally counting down the days until spring. Longer days, cute raincoats, sneakers, sunshine, fresh (not freezing) air...... sigh.

I made some dorky collages of our recent adventures to cheer myself up. I am always hesitant to publish a tonne of personal pictures on here. I guess I'm going all wild and crazy today and sharing a bunch.

Some of these pictures may or may not include:

Coops attending Kindergarten information night (waaaaaah), Winnie eating her first homemade cookie (bad mommy), Coops and I finishing our first chapter book (Charlotte's Web), gymnastics lessons (not for me, I have wobbly bones), Winnie climbing stairs and basically being a daredevil, and Cooper laying beside a twelve-foot python at a local reptile show. Of course there's the usual crafting, baking, skating, sliding, reading, snowmobiling, and playing thrown in there, too.    


In other news, I got my vinyl raindrop cutouts for Winnie's room in the mail on Friday. I'm so excited to get those babies up on the wall. Right now I'm in the process of taping them up temporarily so that I can get the colors and spacing exactly how I want before I commit and stick them for good. I'll share after pictures soon, pinky swear. 

Byeeee!

Winnie's Poor Neglected Nursery / Big Girl Room

23

Thursday, February 4, 2016


Sooooo by accident I haven't even touched Winnie's poor neglected nursery. Can I even call it a nursery anymore? Her first birthday is creeping up at lightning speed. Waaaah!

I'm feeling a lot of mom guilt about it actually. The poor girl has been staring at bare white walls for months and months. 

There are a few reasons that I haven't made any progress on her room since we repainted and purchased some crib bedding

Reason #1. The days are kinda chaotic with the Coopster running around (and doing about a thousand outfit changes a day), Winnie crawling around (trying to eat every power cord and cable she can find), Lexie barking outside (and sounding like she's going to eat the neighbor's dog for breakfast), and Roary knocking the kids over (trying to steal scraps of food like it's his job). It's fun, buuuuuut it's kind of like we live in crazy-town. 

:)

Reason # 2. I was kinda stumped on the direction that I wanted to go with the room. I was holding out for some more inspiration f-o-r-e-v-e-r and it all kind of came to me over the last few weeks. 

Reason #3. Self-diagnosed A.D.D. The struggle is real.

Here's where we left off. We repainted Cooper's old nursery with a fresh coat of white paint. I relocated the crib across the room in between the windows and purchased some cute bedding from Pottery Barn Kids. That's how the room has looked up until a few weeks ago.


I really liked the idea of the crib centered between the windows. However, the room is so tiny that it didn't leave a lot of room or options for furniture placement. I relocated the crib back to it's original spot in the opposite corner of the room.

I would have loved to do a wall of horizontal, white planks (they're my favorite) but I didn't want to rope Alex into another big project at the moment since he's still finishing up the trim-work in our side entry. 

So. I kept thinking and thinking (obsessing?) about the adorable raindrop wall that Young House Love did in Clara's room. I decided to use the best form of flattery there is - yup - straight up copying!

I ordered some vinyl color samples from Leen the Graphics Queen since I've heard nothing but great things about her Etsy shop. I pulled five colors from Winnie's baby quilt and asked if the shop could custom make some 1.5" x 3" raindrops. They said yes and they are being shipped as we speak!

Quilt - Pottery Barn Kids

Custom Wall Decals - Leen the Graphics Queen

Once I made that decision everything else kind of came together. Here's where I'm heading with Winnie's nursery / big girl room. I'm going for a light, airy, whimsical, cottage vibe.

Light, Airy, Whimsical, Cottage Girl's Room Idea Board

Since I'm doing this little makeover on a budget I'm going to be reusing the round, jute rug and white, slip-covered armchair that were used in Cooper's nursery.

Jennylund Armchair - Ikea

Jute Rug - Natural - Pottery Barn


I looooooove this blue wire wall storage basket. I used it for inspiration when I picked up a powder blue, wire floor basket from Homesense to corral stuffies and dollies. Awwww, stuffies and dollies.

Blue Wire Basket Inspiration - This Modern Life

Adorable Stuffie Inspiration - Hazel Village

When I was cleaning out my front closet I found an old slate chalkboard that I used for a few photo sessions. I think I'll use it on one of the existing wall shelves.

Slate Chalkboard Inspiration - Source Unknown


We really need some more storage in the room so I've been on the hunt for a nice, tall dresser that will fit between the two windows. I've been using this one for now but three drawers is just not cutting it. The girl's got a lot of ruffled butt pants. 


I love the character of old / antique pieces of furniture but we just couldn't seem to find any that we really liked locally. After months of looking on Kijiiji we finally decided to just go with the Hemnes, six-drawer dresser from Ikea that Alex would pick up on his next work trip to Toronto. 

Then! Two days ago Alex found a listing for an antique, solid oak dresser. It's perfect!

Antique Dresser Gonna Get a Makeover

We're loading up the kiddos and picking it up tonight. Tip: you've gotta start the kids early on antique furniture finding adventures.

I'll also need some kind of lamp for cozy story-time. I love this simple white lamp from The Land of Nod. I'm not digging the price ($80 CAD for just the base) but I just saw a similar one at Wal-Mart for $30. I'll have to run back and snag it when I get my weekly allowance.

White Lamp Inspiration - The Land of Nod


Easily accessible (and durable) toy / book storage is a must. I want to use some woven baskets and wooden bins to warm up the space. I already found some boxes from Homesense that are soooooo cute. I'll make sure to share some pictures in my next-ish post.

Wooden Storage Inspiration - Serena and Lily

Woven Basket Inspiration - Pottery Barn

I found a super cute art print that I'm going to order when the next weeks' weekly allowance comes in. I love when things look cute enough to eat. Was that cheesy? I think that was cheesy.

Ice-Cream Watercolor Art Print - Kelly Ventura - Etsy

My last idea (for today) is curtain fabric. I've scoured all ends of the internet for something really, really, really cute. The fabric that I keep coming back to is ADORABLE. But it is also super expensive at $44 CAD a yard. Boooooo. 

But I really, really, really, really want it. 

Ruffled Ribbon Fabric - Minted

Ruffled Ribbon Fabric - Minted

Ruffled Ribbon Fabric - Minted

I could get the fabric shipped to my in-laws (they are in Florida right now) to avoid paying international shipping / customs / duties. However, I wouldn't be able to see the fabric in person before purchasing. What are your thoughts?!?!? Oh, I just don't know.

I'm tossing around a few other project ideas that I will of course share if they ever, you know, actually happen. 

For now, I am super pumped that I've got some decisions made and cute projects in the works. Let's hear it for a wall of colorful raindrops and a soon-to-be freshly painted dresser! 

Woot woot!

P.S. My little Coopster deserves mad props today. He just sat at the dining room table and put together a 48 piece Spiderman puzzle by himself while I worked on this post. Are you thinking what I'm thinking? Boy genius? 

;)

Related Posts Plugin for WordPress, Blogger...

Cozy.Cottage.Cute. All rights reserved © Blog Milk Design - Powered by Blogger