

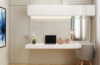
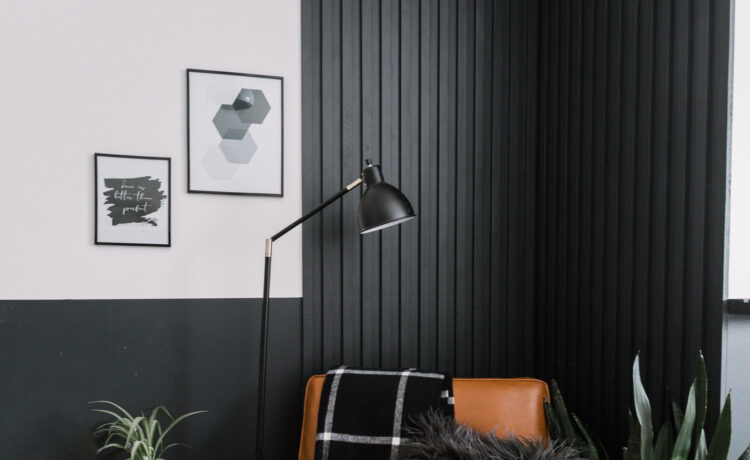
If you visited high-end hotels or designer homes, then you might have noticed wood slat panels that give them a high-profile look. This feature is not ordinarily seen in homes which makes them even more unique. Moreover, black wood slat panel accent walls are an excellent way to add visual interest and depth to a room. Also, these create a focal point and can dramatically change the look of your space. Mainly, it will revamp and add glamour to your space. However there are so many options available, but no one can match the level of these black wood slat accent walls.
Moreover, once installed, you will have these for years without feeling any regret or guilt. Also, installing wood slats on a wall can be tiring and time-consuming, but it is easy. However, we have got you step by step solution that will save a couple of your time.
So roll up your sleeves and get going to have a unique wall at your home.
Fundamentals of Installing Wood Slat Panel

A wood slat panel is made up of dividing the wooden sheets into vertical strips and placing them evenly on the black-painted wall. Each wood sheet is marked accordingly, mainly from ½-inch to 2 inches wide. However, the size and width of the sheets depend entirely on your creativity and how you want them to look. Generally, the wood slat panels are narrow so that they provide a sleek and finished look.
Also, before placing it on the wall, you need to see that the spacing between the consecutive wooden strips should be ¼-inch to ½-inch. However, if you don’t want your wood slat wall to give a zebra-stripe effect, then the spacing between the slats should be less than the width of the slats. Moreover, the most important thing that you want to keep in mind before creating this wall is the background of the wall. It should be in a dark tone to give a dramatic effect. You can go with matte-black for a modern look.
Materials Required for Wood Slat Panel
- Table saw
- Wood Slats
- Black Paint or stain
- Primer
- Nails
- Eye protection
- Putty knife
- Heavy gloves
- Tape Measure
- Plywood sheets
- Construction glue
- Wood filler
Steps to Create a Black Wood Slat Accent Wall
If you’re looking to enhance your home with this eye-catching feature, here’s a step-by-step guide on how to create a black wood slat accent wall.
1. Plan and Prepare

Before beginning this project, you need to plan and prepare everything accordingly. This is because this wood slat panel needs materials and time to have a perfect and unique wall. You also need to inspect the wall where you want to have this wood slat panel. Consider choosing a wall that doesn’t have any architectural features like windows or doors to ensure a smooth installation process.
Measure the dimensions of the wall accurately, taking into account any obstacles or outlets that might affect the placement of the slats. Also, do not consider any wavy walls, as they are not perfect walls for this creative masterpiece.
2. Selection of The Wood Slat

Well, if you want to have a wood slat panel, then you should have everything noted, just like the amount of wood required to make this unique wall, along with the dimensions of the wall and the wooden ply. You can have vertical and horizontal slat walls, then completely depends on you.
Vertical slat walls give the illusion that the walls and ceilings are much taller than they actually are. On the other hand, the horizontal slat walls tend to make it look more spacious. If you have a smaller room, then you can surely opt for the horizontal slat wall option.
3. Paint the Background

Painting the background is the essential step, as this will only bring out the color of the wood slat panel. Select a black paint or stain that complements your overall interior design scheme. Ensure the product is specifically formulated for wood and provides good coverage. Moreover, matte or flat paint dries quickly so that you can coat it a second time for a better finish.
Also, to ensure a smooth surface for installation, prepare the wall by removing any existing wallpaper, paint, or imperfections. Repair any cracks or holes with putty and sand the surface until it’s smooth. Wipe away any dust or debris to create a clean canvas.
4. Cut the Wood Slats

In order to have a wood slat panel, you need to have the plywood cut into equal strips. If you are using pre-cut lumber slats, you can skip this part, but if not, then use a glove and eye protector while cutting the slat. Just run the plywood lengthwise on the table mentioned above saw so that you can have a ½-inch wide strip. Keep checking that all the strips are cut uniformly widthwise.
After you are done with this, you might notice that these wooden strips have large voids or holes. If you skip this step, then you might not have the finished look of the wood slat panel. Thus, you need to use the putty knife and fill these voids or holes with a wood filer.
5. Sand and Paint the Wood Slats

While you are wearing those heavy gloves, now you need to sand these wood slats individually. This step will ensure that your plywood is stain free and will have a clean look after you paint it. Just run the sandpaper lightly on the slat to remove the stray splinters.
Once you are done sanding the wooden slat. All you need to do is paint them so that you get that desired black wood texture. Paint or stain both sides of the wood slat, and you can avoid the side that you are going to place on the wall. Also, do not coat the back, as it will harden and prevent the slat from staying flat against the wall.
6. Cut Ends of Wood Slats

Now you need to measure the length of the wood slats according to the wall so that you can fit the entire wood slat panel on the wall easily. The slat should be at some distance from the floor to the ceiling, and you can minus the ¼-inch so that you can allow the wood to expand and contract.
Moreover, you should cut the strips one by one as the heights between floor to ceiling usually vary across the width of the wall.
7. Install the Wood Slat Panel

After you are done with all the necessary steps now, all you need to do is install the wood slat panel on the freshly painted wall. Firstly coat the wall with construction glue on the length of the first slat and place it on the wall. After that, place the next one while maintaining a uniform distance. You can also nail them so that the strip is secured.
If there is any board or any obstacle between the stripes, then use a miter saw to cut the slats around it. In the last, just touch up the installed wood slat panel with a brush for paint. And your magnificent eye-catching wood slat panel with black background wall is ready.
Conclusion
An accent wall is often seen in hotels, and having them at your home will give you a luxurious feel. Thus, putting in all these efforts and following the steps mentioned above will make you smile once you are done. Also, you can add a coat of polyurethane to protect the wood and enhance its longevity in the end. A wood slat panel with a black background will instantly elevate the style quotient of any room.
You’ll be able to create a striking focal point that adds depth and sophistication to your home. Get ready to enjoy compliments from friends and family as they marvel at your stunning black wood slat accent wall. Just patiently follow these steps and have a well-curated accent wall for your home.
Also, keep in mind your safety while you are working with a table saw. Do not do it alone. Have some company, as it can be hazardous, and with repetitive cutting, it can be more dangerous. Be safe and create a beautiful accent wall for your home.
Frequently Asked Questions
What is a Black Wood Slat Accent Wall?
A wood slat panel with a black background wall refers to an interior design element where wooden slats are installed on a wall with a black-colored background. Moreover, the slats are made of high-quality wood and can be arranged vertically or horizontally to create a visually striking accent wall.
Can I Use Any Color Other than Black for The Background of The Wood Slat Panel?
Yes, you are allowed to choose any color you wish for the background of your wood slat panel wall. However, black is more popular because it gives a modern and dramatic appeal and will complement the interior of your house. Moreover, please choose colors that create contrast or harmony with the surrounding elements in the room.
How to Take Care of The Wood Slat Panel Accent Wall Once Installed?
In order to take care of the installed accent wall, you just have to dust the slats using a soft cloth or a duster. Avoid using abrasive cleaners or solvents that can damage the wood or the black background. If there are any spills or stains, gently clean them using a mild soap and water solution. Regular maintenance will help preserve the beauty and longevity of your wood slat panel wall.
What is Better, Painting or Staining the Wood Slats?
The choice relies completely on your preference and convenience, as both options are great. Painting the slats black will provide a solid and consistent color, while staining will allow the wood’s natural grain to show through. Both options can create a beautiful black wood slat panel wall, so it ultimately comes down to your preferred look. So, it depends on you what is the desired aesthetics that you want for your home.
