

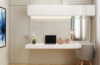
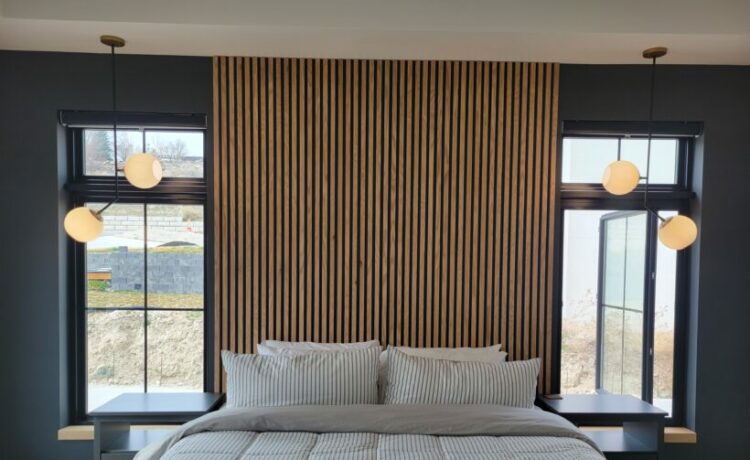
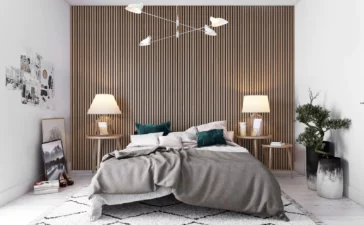
Who wouldn’t like a good wood slat panel? It’s like an exclamation point in the design of your room. It makes a statement, it adds a splash of texture and a little color (depending on your mood), and a great wood slat panel can be a focal point or a conversation piece. But what if your wood slat panel could do all that and more? What if, just what if, it could also be a “Work of Art,” a place to display your unique style and personality?
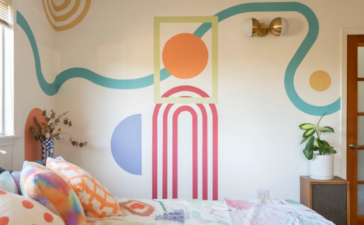
Every house has that one wall in their home they don’t want to look at, and it could be for any reason. It could be that you just hate that wall, or it could be that it just doesn’t go with the aesthetic of your entire house.
With a Black Wood Slat Accent Wall, you can just do that. It is a little hands-on DIY project adventure, but it’s worth the effort. The end result is a unique, eye-catching feature that will add a touch of drama and a twist that your home was longing for.
Steps to Get Yourself a Beautiful Black Wood Slat Accent Wall
Let’s start off with this incredible DIY project that will revamp your house while adding a stunning addition to your room. With a few simple steps, you can transform a plain wall into a stylish focal point and make it the talk of the town at your next weekend’s party!
Step 1: Gather the Material

It might not look much, but having all the must-need materials at hand to create a great wood slat panel with black wood is important, and that is why this is the most important step that you shouldn’t skip before getting on with this DIY Project. So, this is your project checklist of all the must-have items before you start creating your envisioned wood slat panel. Here are all the materials you will need:
- Black Wooden Slats: The most important component. You can buy wood that is long enough to cover the desired wall area. The length and width of the slats will depend on the size of your wall and your personal preference.
- Measuring Tape: It is essential for accurately measuring the dimensions of your walls and determining the length of the slats needed.
- Level: It is needed to ensure that the slats are installed straight and even. By placing the level against each slat, you can easily adjust their positioning to achieve a perfect level wall.
- Pencil: It is used to mark the placement of each slat. You can ensure that they are evenly spaced and aligned. You can also use chalk to mark the markings on the wall.
- Drill: The drill is a versatile and essential tool for installing slats on an accent wall. With its power and precision, the drill can effortlessly create pilot holes for screws, ensuring a secure and durable attachment.
- Screws: They can be easily and securely fastened to the accent wall using the drill. This ensures that the accent wall remains firmly in place, even with heavy or large objects hanging from it.
- Wall Anchors: They are also a great option for securing objects to the accent wall. These small but mighty devices distribute the weight of the hanging object across a larger area, preventing damage to the wall.
- Paint: Painting your accent wall is another way to enhance its appearance. Adding a fresh coat of paint can bring new life to the space and complement the objects you choose to hang.
- Paint Brush and Roller: Use a paintbrush and roller to apply the fresh coat of paint. It allows for precise application and can help achieve a smooth and even finish on the wall.
- Wood Filler and Sandpaper: The wood filler helps to fill in any cracks, holes, or imperfections in the wall surface, ensuring a smooth and even finish. Sandpaper is then used to gently sand down the filled areas and create a seamless surface for painting.
Also, remember that creating a Black Wood Slat Accent Wall requires measurements, proper installation, techniques, and attention to detail.
Step 2: Time to Measure and Plan

Before you go ahead and start installing the slats, measure the dimension of the wall where you want to create the panel. Use a measuring tape to determine the height and width of the wall. Based on these measurements, you can calculate the number of slats you will need and how much space you will need in between them.
It’s essential while designing a wood slat panel to map out everything carefully to ensure a visually appealing result. Consider the overall design and aesthetic you want to achieve with the wood slat panel. This will help you determine the size and spacing of the slats, as well as any additional elements, such as patterns or alternating colors. Taking the time to plan out these details will ensure a cohesive and professional-looking finished product.
Step 3: Prepare the Wall

Start by preparing the wall surface. Ensure that the wall is clean and free of any debris. Now apply a coat of paint in the desired color, which in your case would be black. Though it is an optional step, you can add another color that compliments your primary color. It can enhance the overall appearance and final look of the wood slat panel.
Additionally, consider using a primer before applying the paint to create a more smooth, even and sleek surface. This will help the slats adhere properly and prevent any potential peeling or chipping in the future. Finally, make sure to measure and mark the wall accurately to ensure precise placement of the slats for a polished and clean final result.
Step 4: Install Wall Anchors (If Needed)

If you are planning to create your wood slat panel on a drywall or plaster wall, it may be necessary to install wall anchorsto provide extra support for the slats. Wall anchors are especially important if you plan on hanging heavy items on the slats, as they will help distribute the weight evenly and prevent any damage to the wall.
Also, make sure to choose the appropriate size and type of wall anchor based on the weight of the wooden slat panels and the material of your wall.
Pro tip: Follow the manufacturer’s instructions to install the anchors securely.
Step 5: Time to Install the Slats

Begin by measuring the wall, measure the wall and the width of the wall where you want to install your slats for your black wood slat panel. Cut the wood slats according to the size and length. Now, start marking the wall where you want to install the slats, keeping space between them, the space can depend entirely on you, but the most common spacing is ½-inch to 1-inch. Use a level to mark the wall where you want to install the slats.
Drill pilot holes for the screws in the marked locations. This will help to prevent the wood from splitting. Attach the wood slats to the wall using the screws, fill any gap with wood filler, and once dried, smooth it using sandpaper.
Step 6: Sprinkle the Finishing Touches

Once all the slats are in place, and your vision of a black wood slat panel comes into view, step back and inspect the wall for any necessary adjustments to ensure a seamless finish. If desired, you can apply a clear coat of varnish or paint to protect the wood and enhance its appearance. This will also give the slats a polished and professional look.
You can also consider adding a trim or molding around the edges of the slats to enhance further the overall aesthetic of your newly installed wood slat panel and also give it more of a clean and finished look. Now, step back one last time and enjoy admiring your newly installed wood slat panel, which you DIYed in exchange for your blood, sweat, and tears.
Tips and Tricks in Installing Wood Slat Panel

Here are some tips and tricks that can help you in installing the wood slat panel a little more easily:
- If you’re using a power drill, use a sharp drill bit that is the same size as the screws you’re about to use. This will help to prevent the wood from splitting.
- If you’re not sure how to space the wood slats evenly, use a chalk line to mark the wall.
- If you’re using wood filler, be sure to sand it smooth before applying the second coat of paint.
- If you want to create a more textured look, you can sand the wood slats after they’re painted.
- If you want to add a unique touch by incorporating different colors or finishes on the wood slats.
- If you want to add a little twist, you can try adding decorative elements such as stencils or decals.
Some of these tips and tricks can change the entire look of your wood slat panel by giving them a more visually interesting and dynamic design while keeping them stylish and beautiful at the same time.
Variations for Your Wooden Slat Panel

You can dabble into some variations that take your wood slat panel up a notch:
- You can use different widths of wood slats to create a different look.
- You can use different colors of paint to create a more colorful accent wall.
- You can use stained wood slats instead of painted wood slats.
- You can add LED lights behind the wood slats to create a dramatic effect.
- You can experiment with the angle at which the slats are installed, creating a unique geometric pattern on the wall.
- You can also incorporate shelves or hooks into the design can add functionality to the space while still maintaining a stylish aesthetic.
These variations can make your wall slat panel can go from one level to another while giving you something that you have only envisioned in your imagination or see something on an Instagram reel.
Conclusion
Creating a black wood slat accent wall is a great way to add style and personality to your home. With a little bit of time and effort, you can create a beautiful and unique wood slat panel that will be the envy of your friends and family.
Here are some additional tips for creating a black wood slat accent wall: Use a variety of wood slat widths to create a more interesting look, or you can paint the wood slats a different color than black to create a pop of color.
No matter how you choose to style it, a black wood slat accent wall is sure to add a touch of sophistication to your home. Remember to measure, plan, and take your time during the installation of your wood slat panel. So, get creative, get your hands dirty, and have fun with it, and you will end up having a stunning black wood slat accent wall that will undoubtedly impress your guests. Happy Crafting!
Frequently Asked Questions
How Much Gap Do You Need for a Wood Slat Panel?
The wood slats should be spaced about 1/4th-inch to ½-inch apart from each other. However, it can also depend on the designer. To avoid a zebra-stripe effect, spaces between the slats should be less than the width of the slats.
What is the Best Wood to Use for a Wood Slat Panel?
Walnut and White Oak are the most iconic wood textures (especially for wood paneling), but more affordable options can be Ash or Maple as they give more of a premium look and feel of hardwood. Due to their density, maple and ash are known to take stains well and still be relatively easy to work with.
How Do You Clean Wood Paneling?
They can be cleaned normally like any other furniture you have. Just use a normal dusting cloth to remove dirt and lint, which can collect on paneling; however, mostly at the lower half of the wall due to cleaning the floor and other things.
Are Wood Slat Panels Waterproof?
No, but to get that ensure you use wood that has been treated with a sealant or painted with waterproof paint. You can also install a vapor barrier behind the paneling to help reduce moisture buildup inside the walls to make sure that the wood doesn’t expand.
What is the Thickness of The Wood Slat Panel?
Slat walls are generally offered in a wide range of sizes, groove configurations, and finishes, along with other solutions. Typical panels are 3/4″ thick, 4′ x8′ in size, and are grooved 3″ 0/C long groove. However, it can also depend on the designer.