


A few weeks ago I did a reveal of our newly remodeled powder room. It was so close to being complete when we posted all of our photos....but it still lacked a cozy-it-up window treatment.
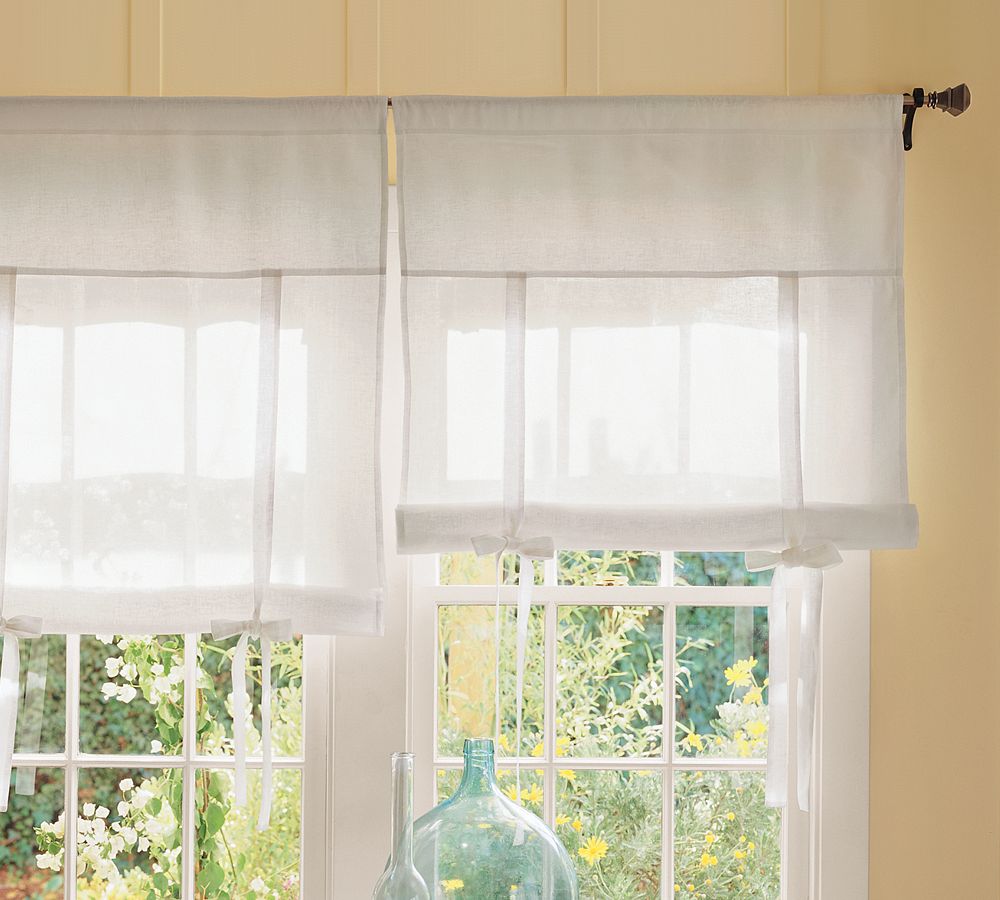
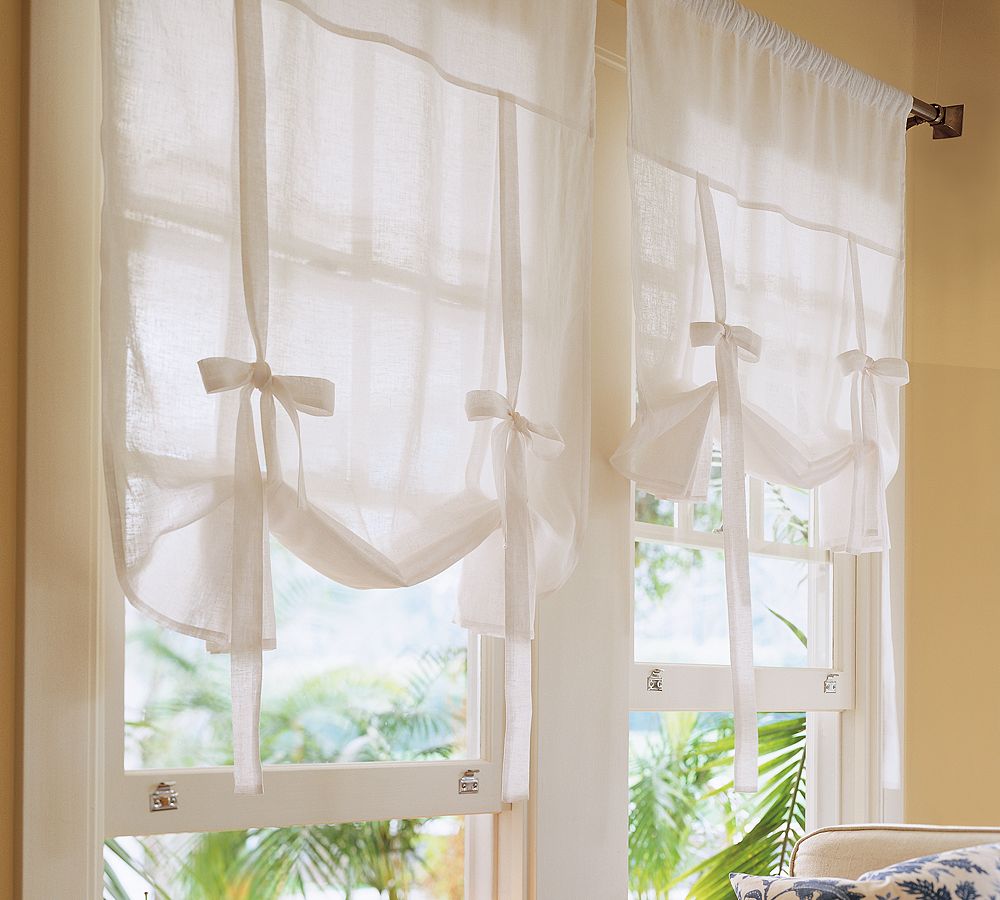
I've had my eye on the following tie-up shades from Pottery Barn for years. Years! My dream has always been to order five of them and use them to dress up our five large sunroom windows. Like the bathroom, they also need some window treatments to finish them off and make the room a bit cozier.
The problem with the Pottery Barn tie-up shades is that they are only available through catalog/internet ordering and of course they do not ship to Canada. Woe is me! All of the possible options for getting them here require way too much money in shippings costs.
So the other night I was checking out the amazing Pottery Barn Knock-Off projects at The CSI Project..... all forlorn because I didn't really have a project to enter. That's when the lightbulb went off.
Could I make a tie-up shade???
I decided to try and make a teeny, tiny shade for the bathroom and if it (gulp) turned out okay, then I could possibly make the ones for the sun-room later.
So I headed to Fabricland to see if I could find a similar fabric. The Pottery Barn shades are a blend of linen and cotton. Hmmm, I couldn't find any of that so I settled on some crisp, white cotton twill.
I looked at a few tutorials online which claimed that one shade took about an hour to make. THEY LIED!!!! I won't even admit how long it took me to make this little shade from start to finish. Let's just say an hour multiplied by a lot. Don't forget to add in a couple of mistakes and an iron burn on my knee. Tip: Don't iron on the floor in the dark.
I'm still kind of amazed that I actually did it. I sewed stuff!
Without further ado, here are the Pottery Barn Tie-Up Shades:
Here is our bathroom window before:

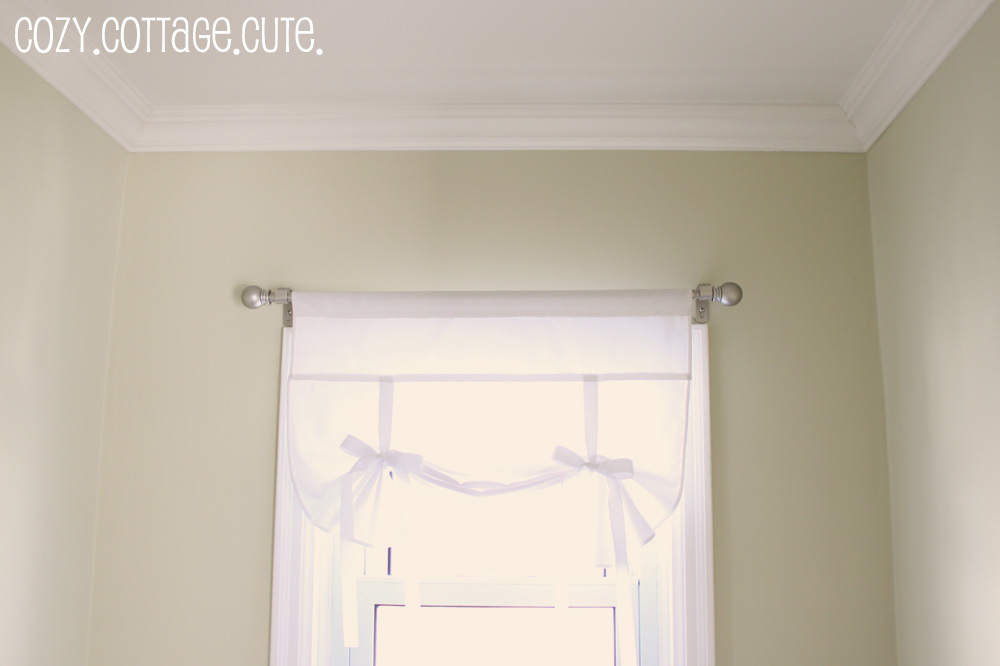
Here is our bathroom window after:

Here is our bathroom window after:

Rolled up all nice and neat:
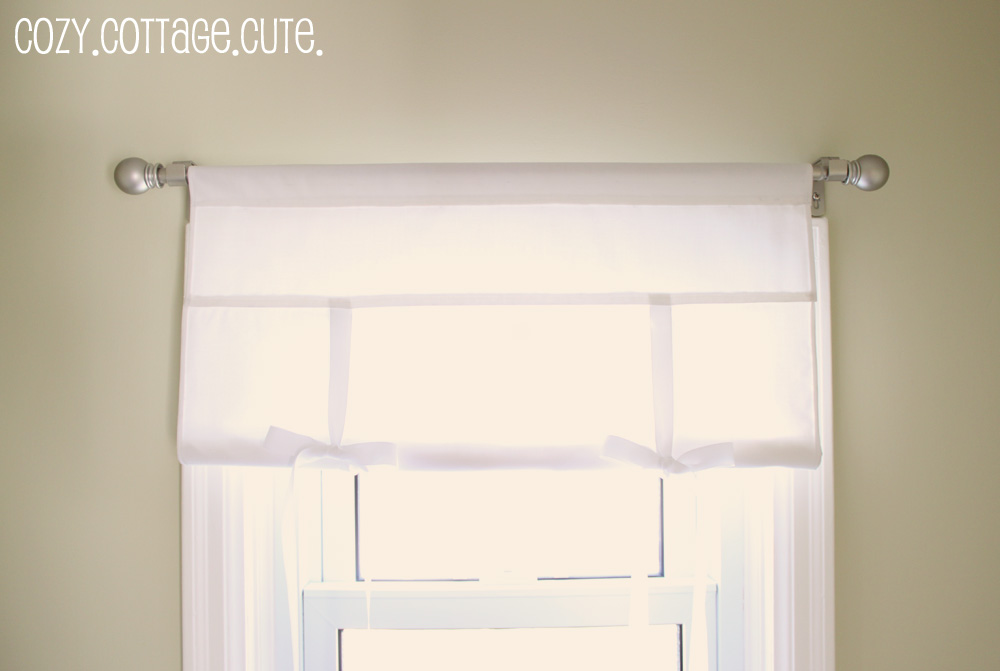
Swoopy and droopy:

I think it adds just a little bit of cozy. Lovin' it.
P.S. I took photos as I went so if anyone is interested I could always post a tutorial on how I
P.S.S. It cost $12 for a metre and a half of fabric (with lots left over) and $4 for a huge roll of ribbon (lots left over as well). So much cheaper than the real thing!
P.S.S.S. I'm entering this project into the Pottery Barn Knock-Off Contest at The CSI Project (see button below).


Whatever Goes Wednesday @ Someday Crafts
Show and Tell Friday @ My Romantic Home
Frugal Friday @ The Shabby Nest


Cute, cute, cute!! You do know that the csi challenge is pottery barn inspired this week, right? If not, you should totally link this up since it's adorable and all :]
ReplyDeleteI love it Sarah!!!
ReplyDeleteSo cute! I would definately be interested in the tutorial!
ReplyDeleteI want to make a roman blind for my kitchen back door, but I like the ties on this much more. Would love you to post the tutorial. I've picked out the material, but don't know if I'm brave enough to attempt it... would you recommend this project for a novice? Lx
ReplyDeleteOh please post how you winged it. It looks so very very very much like the PB one. I suck at window treatments and would like these in my bedroom.
ReplyDeleteSuper cute!!! Definitely a fantastic alternative to Pottery Barn. I love that stuff but I'm too cheap to by anything from there that isn't on sale. Job well done!!
ReplyDeleteYou did a great job Sarah. It looks so pretty in your bathroom. Much better than Pottery Barn :)
ReplyDeletethose came out soooo cute! you sew, too! amazing!!
ReplyDeleteWell done! I might try a tie-up shade for the kitchen window. I made one once for my girls' room, but the window was so big, that it all just kind of drooped.
ReplyDeleteWow!! They turned out so darling ;) Great Job!!
ReplyDeletehigh five!!! it looks awesome!!! way to tackle this yourself, and yes, you should post the tutorial:) do i have to know how to sew to do this?
ReplyDeleteHi
ReplyDeletePlease do the tutorial. It looks great. Hey i am a Canadian girl myself. Living in Ottawa. Email me, would love to chat. copp12@hotmail.com
Dianne
Super cute! I was thinking of the same kind of curtains in my living room! You have inspired me! Well done!!
ReplyDeleteThose are really cute! Please do post a tutorial. I need some for my bathroom as well!
ReplyDeleteI also wanted to let you know that I featured your side table on this weeks We Can Do It Cheaper. Thanks so much for linking it up and please link up any of your projects again this week. Love them!
Those are seriously super duper cute! They look just like PB's!
ReplyDeleteReally neat, I love everything about them and great job with the hardware...I'm still waiting on mine to get put up!
ReplyDeleteRondell
Nice job! I like making things with straight lines!
ReplyDeleteWOW! You did the whole thing all by yourself! And it looks even better than the PB ones -- you did such a great job! :)
ReplyDeleteLaura,
ReplyDeleteI think you should go for it! I am not really an experienced sewer all though I have made 3 cushions (machine) and made a few dolls (mostly by hand). Everything is pretty much sewing straight lines, although the trickiest part for me was figuring out the measurements at the beginning so that the shade would fit the window. I'll try to explain how I figured it out when I make a little tutorial. I can't guarantee that it will make any sense though!
P.S. I still think you should go for it! I didn't think it would turn out, and it did. :)
Cheers,
Sarah
Wow, that turned out great! I made one once and I agree, it's not a one-hour project. Good for you for getting it done!
ReplyDeleteI have to do that for my door window. I have a PB one in my bathroom and I love it.
ReplyDeleteYours looks just like it!
Simple. crisp, and adorable.
ReplyDeleteYou did a great job on these !!! Gave me some ideas for my own bathroom window - out this baby on the list of to dos :)
ReplyDeleteThat is such a sweet shade! LOVE IT! I'm thinking that would look perfect in my guest room. I would love to read a tutorial if you had the time to write one. Thanks for sharing!
ReplyDeleteBrittany
http://www.prettyhandygirl.com
Good for you! This is wonderful. Is there a dowel in the bottom hem to help "roll"it up? It looks so tidy.
ReplyDeleteThanks for leaving me a kind comment on my PB inspired project.
You did a wonderful job! I found your blog through New Friend Fridays at TCG / Trendy Treehouse. New follower :)
ReplyDeleteThose came out sooo great and the cost is unbeatable. I think they are just as nice as anything I've seen at PB.
ReplyDeleteBTW - we have a unique kitchen or laundry backsplash giveaway that might be useful to you or a friend. Please stop by our Giveaway Friday! Jane F.
Wow! Your shades are fabulous. I recently had a friend make me some curtains for my laundry room and I know all of the work that went in to making my simple window coverings. I know you put a lot of time into yours. They are just gorgeous!
ReplyDeleteadorable! i found you thru new friend friday!!!
ReplyDeleteThat looks absolutely perfect! Sorry to hear about the burn on the knee, but I think when doing something out of my comfort zone it's almost a help to get an injury, on the Human Sacrifice Theory - I know I've paid my dues!
ReplyDeleteThere are some great fabric stores on-line if resources are shrinking where you are...
Very nice! I love the way these look! :)
ReplyDelete~Liz
I am hosting a party over at Sassy Sites today too! I would love to have you join us and show off your fun blog! Come by and say hi and grab a button! oh... AND come and sign up for our giveaway too! $50 Gift Card in Vinyl Lettering!! xoxo
ReplyDeleteMarni @ Sassy Sites!
Absolutely amazing. A tutorial would be sooo helpful!
ReplyDeleteI would love a tutorial for these awesome shades! You did a fabulous job. Found you at the Shabby Nest. :)
ReplyDeleteI've had my eye on the Pottery Barn shades, too, and couldn't bring myself to spend the money on them. Then I noticed that we had some old white linen fabric and figured we could make our own. Well, my husband anyway. He is the one who does the sewing in our house. :)
ReplyDeleteAnyway,I was researching home made tie up shades online and found yours. You did a BEAUTIFUL job! Thanks so much for the inspiration. I'm going to go check out your tutorial right now!!
Beth.
I've put together a round up of PB inspired projects on Craft Gossip today and included your project. :) You can see it here
ReplyDeletehttp://homeandgarden.craftgossip.com/9-pb-inspired-projects/
If you would like to share the Craft Gossip love and show your visitors you've been featured, you can grab a button here!
http://homeandgarden.craftgossip.com/grab-a-craft-gossip-button/
BEAUTIFUL....and i must say, i think yours is even nicer than pottery barn's.
ReplyDeletehugs
janet
Absolutely amazing. A tutorial would be sooo helpful!
ReplyDeleteadorable! i found you thru new friend friday!!!
ReplyDelete