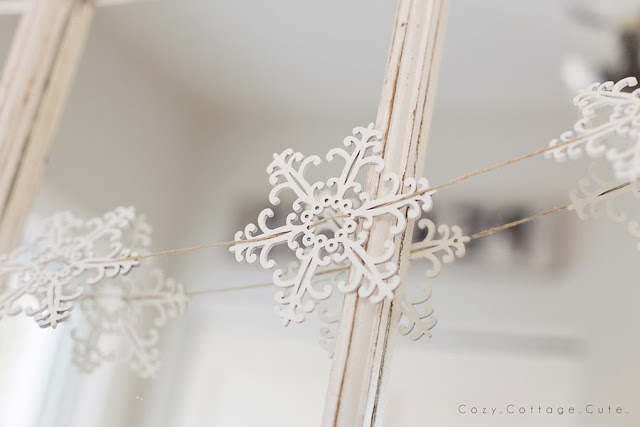
Right now I'm sipping an afternoon coffee while my little monkey is snoozing away in his crib. And I'm doing a little happy dance because I finished a little Christmas craft! And it's cute! And I put it up before December 24th!
A few years ago I made a really simple bell garland. I still love it but alas it is buried in one of those giant blue Rubbermaid totes in the basement. Oh, the basement.
So, I was inspired to make another one. My requirements were:
- it had to be natural looking
- it had to be inexpensive
- it had to be simple
- it had to be white, green, or brown
I started out with three packages of wooden snowflakes from Lowes. They came in packages of six for 3.99. Score! (Anything less than $5 is practically free in my opinion.)(Just kidding honey!)
While I knew that spray-painting the snowflakes would probably be the easiest, I opted to try using leftover wall paint and a paintbrush. Not the brightest idea I've ever had. It took about three hours to paint one snowflake and the paint was way too sloppy and gloppy to get into all of the little nooks and crannies.
So, I unwillingly busted out the spray-paint. It reminded me of how much I hate that stuff. Even using a mask I got the worst headache ever and am pretty sure that I killed about half of my brain cells. The only good part about spray-painting was that it took like, two minutes to paint them all and only ten minutes to dry per side.
I really wanted the snowflakes to lay flat against my giant entryway mirror so I opted to string the twine through the centre of each snowflake rather than just hang them from the tiny pre-drilled holes at the top of each one. It worked like a charm.
I only used six snowflakes for this little garland so I have quite a few left. I think I might use the extras to make little snowflake napkin rings. If I don't get around to that I can always just hang them on the tree! Note to self: go and get Christmas tree.
;)
P.S. Cooper is up from his nap and says hi.
Sharing Here:
Whatever Goes Wednesday @ Someday Crafts
From Dreams to Reality @ The DIY Dreamer
Work It Wednesday @ The Happie Housie
Power of Paint Party @ Domestically Speaking
Tutorials and Tips Link Party @ Home Stories A to Z
Inspiration Gallery Link Party @ Design, Dining, and Diapers
From Dreams to Reality @ The DIY Dreamer
Work It Wednesday @ The Happie Housie
Power of Paint Party @ Domestically Speaking
Tutorials and Tips Link Party @ Home Stories A to Z
Inspiration Gallery Link Party @ Design, Dining, and Diapers


Simple and beautiful! Cooper is so cute!
ReplyDeleteI LOVE this! So simple and beautiful. I love how it looks with the vintage window frame. Thank you for sharing!
ReplyDeletePerfection!! Love the snowflakes!
ReplyDeleteIs he cute or what? Love his hair too...also your neat snowflake garland.
ReplyDeleteThose snowflakes are really pretty and they look better in white. I will look for these or similar ones and give it a try since I love easy and inexpensive too….;) Cooper is adorable…Love that last pic!
ReplyDeleteHoly! How big boy looking is Cooper! So cute! Loving the snowflake garland. It will even look great after Christmas during the long cold winter.
ReplyDeleteKelly
Oh my-laughed so hard at your "Anything less than $5 is practically free in my opinion" comment--I even read it to my husband! I completely agree! (Not even kidding-sorry dear!) Must get to Lowes and get some of those snowflakes--love decorating with snowflakes. Great idea and tutorial! And what a cutie that Cooper is :)
ReplyDeleteSarah, this is so cute! I love the simplicity and that you can use it beyond Christmas!
ReplyDeleteSo cute - definitely worth the spray-painting headache and the $5 set back.
ReplyDeleteThose are so pretty! Love them strung up with twine. I'm featuring them in this week's PoPP Spotlight!!
ReplyDelete