


Disclaimer: I like to call this more of a wingin'-it tutorial. If you are a good sew-er-person, then stop reading right now (and if you do keep reading please don't judge me)! There are a few other tutorials on the net on how to make these window treatments and they did some of the steps in a different order. I'll tell you right now that my steps are prob'ly the ones that are mixed up. BUT, my shade turned out pretty cute anyway so here goes...
Materials:
Sewing machine
Iron
Ironing board
Fabric*
Thread*
Ribbon*
Scissors
Straight pins
Hand-sewing needle
Ruler
Measuring tape
Pencil or fabric pen
Fabric glue (optional)
Fray Check (optional)
Materials:
Sewing machine
Iron
Ironing board
Fabric*
Thread*
Ribbon*
Scissors
Straight pins
Hand-sewing needle
Ruler
Measuring tape
Pencil or fabric pen
Fabric glue (optional)
Fray Check (optional)
* The amount of fabric, ribbon, and thread you need will depend on the size of your shade/window
Instructions:
Instructions:
First you will want to figure out your desired length and width of your window shade. Do you want it to sit inside of the window frame? Outside of the window frame? Halfway in-between?
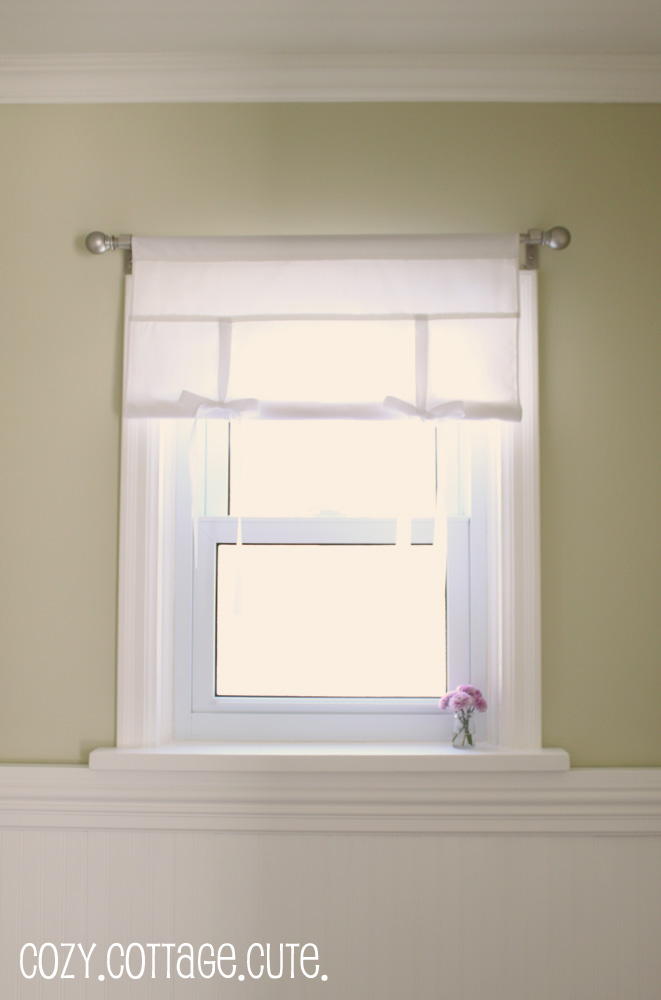
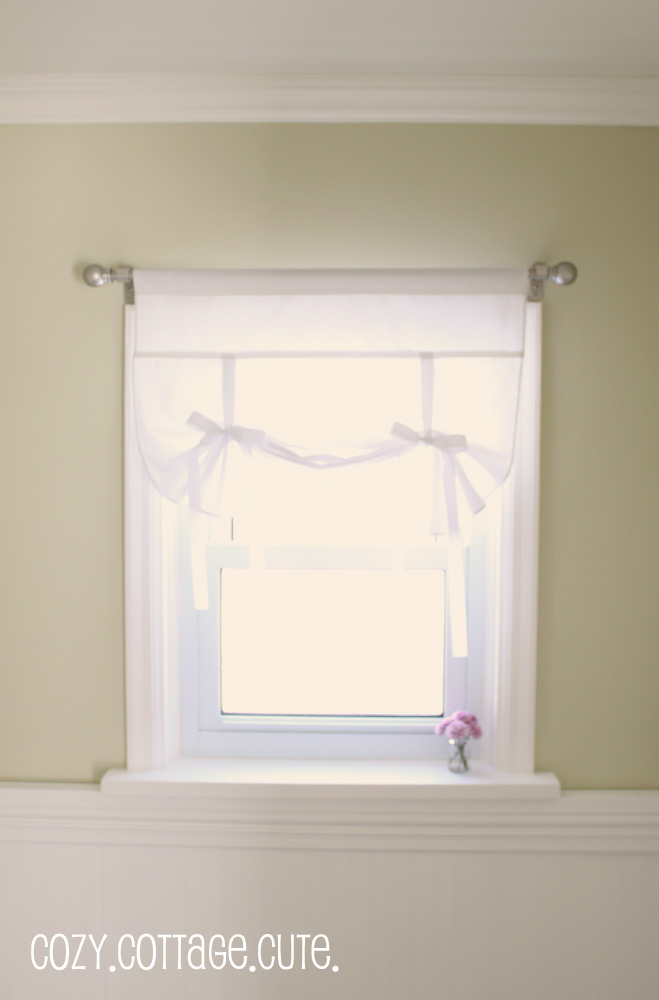
If you look at the picture below, I chose to have my shade sit above the window frame at the top, and have the sides of the shade fall in the middle of the window frame. The measurements of my tiny shade were 25" wide and 34" long.
If you look at the picture below, I chose to have my shade sit above the window frame at the top, and have the sides of the shade fall in the middle of the window frame. The measurements of my tiny shade were 25" wide and 34" long.

Once you've figured out your total desired length, you will need to determine how long you want your rod pocket to be (this will depend on the size of your curtain rod), how long you want your top shade to be, and how long you want your bottom shade to be. You will essentially be dividing your total length into 3 sections. The top shade will be stationary and the bottom shade is what you will be able to tie/roll up or down. How long you make each section is personal preference. Tip: Make sure the length of each section adds up to your total desired length.
I decided to allot 2" for the rod pocket, 4" for the top shade, and 28" for the bottom shade. (2" + 4" + 28" = 34" long). The reason I made such a small top shade was so that I could roll the bottom shade up fairly high to let the sunlight in. I was also using a curtain rod with a small diameter.
 Before you cut your piece of fabric, you will need to calculate the extra fabric needed on each side (for seam allowances, etc.). See the diagram below:
I added 2” to the width for seam allowances. I added 6” to the length for seam allowances as well as the back of the rod pocket.
 Cut your fabric.
Turn your fabric over to the wrong side. Hem the sides of your shade first. To do this, turn each side over 1/2" and press with an iron. Turn the edges over a second time, another 1/2", and press again to create a finished edge. Pin your edges so they stay in place and sew a straight seam. Tip: Check the setting on your iron. If your iron is too hot you may shrink your fabric.
Hem the top and bottom of your shade. Turn the top and bottom over 1/2" and press. Turn each edge over a second time, another 1/2", and press again to create a finished edge. Pin and sew.


Next you will make the rod pocket. Fold the top of the shade down to create your rod pocket. How far you fold it over depends on how much you allotted for the pocket. Pin and sew a horizontal seam across your shade.
I wanted a 2" rod pocket so I folded my fabric 2" down. I sewed two seams to create a more finished look.

Now you are ready to cut your fabric into a top shade and a bottom shade. (How far you measure down and cut will depend on how long you wanted your top shade to be). Starting from the bottom of the rod pocket, measure your top shade and mark with a pencil. Now measure and mark another 1" down (1" seam allowance for the top shade). Your bottom shade will also need a 1” seam allowance. Cut in-between the two seam allowances. See picture below.
I wanted my top shade to be 4” long so I measured and marked a line for a seam at 4” but then I also marked another line 1” down where I would cut the shades into two pieces.

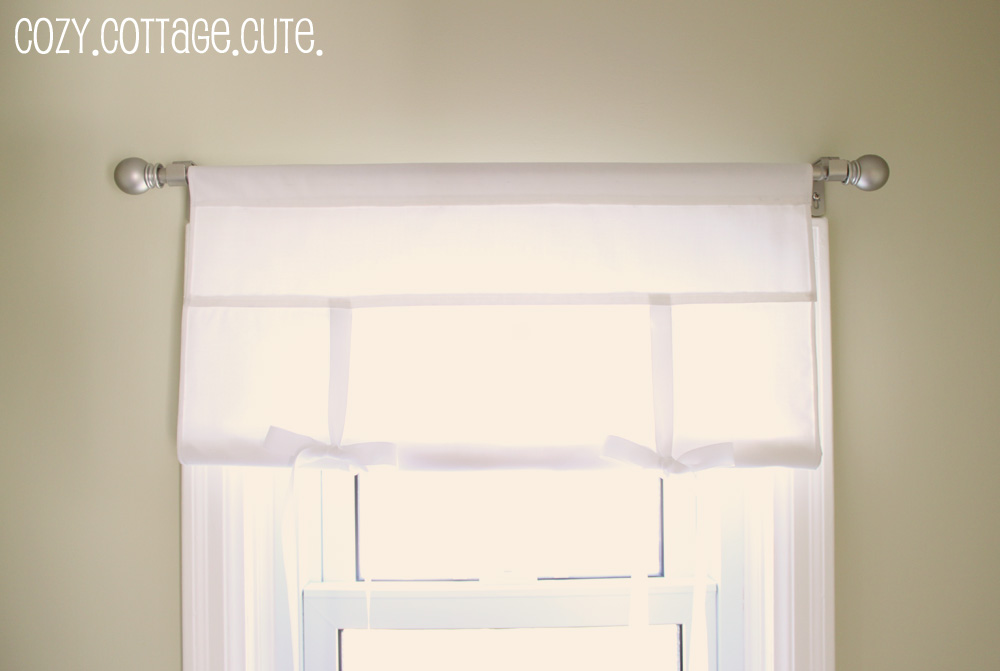
Next you will want to figure out where your ribbon/ties will go. I decided to put each ribbon tie in the middle of each half of the shade (see diagram).
 Cut 4 strips of ribbon slightly longer than the bottom shade. Using fabric glue, attach two ribbons to the front of the bottom shade, as well as two ribbons to the back of the bottom shade. (You will be glueing the ribbon onto the 1” seam allowance.) Your fabric will be sandwiched between the two strips of ribbon. If you don’t have fabric glue you can always pin your ribbon in place.

Now you will be sewing the top shade and bottom shade together. To do this, place the top shade on top of the bottom shade with the right sides of the fabric facing each other. You should see the wrong side of the fabrics at this point. You should also be able to see where you marked your 1” seam allowances. Pin the sides together and sew using a straight seam. Your ribbon will be sewn in as you do this. Once your top and bottom shades are sewn together, you may want to trim the seam allowance fabric and iron them flat.

Trim your ribbon ties so that they line up with the bottom of your shade. Use Fray Check to ensure that the ribbon doesn’t unravel.
Last but not least, hang up your shade and admire your own handiwork! If it turns out. Which I hope it does. ;)
P.S. Tutorials are hard to write.
P.S.S. If you have any questions, fire away.
P.S.S.S. If you end up using this tutorial to craft up your own shade, I'd love to hear how it turned out. :)
P.S.S.S.S. I wrote more about this project here.

P.S.S.S.S. I wrote more about this project here.
Show and Tell Friday @ My Romantic Home
Style Feature Saturday @ Perfectly Imperfect
Frugal Friday @ The Shabby Nest
Everything But the Kitchen Sink @ A Little Knick Knack
Saturday Soiree @ A Little Lovely
Weekend Wrap-Up Party @ Tatertots and Jello
Sunday Showcase Party @ Under The Table and Dreaming


Your tie-up shades are cute! And you did great on the tutorial! I'm still practicing on that myself, especially since my blog is new. :) I will have to try this.. since I don't have any curtains or blinds in my office/craft room!
ReplyDeleteOh and I came here from New Friend Fridays at The Girl Creative. You posted right when I did.. but I think you got ahead by a few seconds! :)
Hi Sarah, I have been waiting for this...I love your shade! I want one for my bathroom and laundry room, they are so cute!!! Great tutorial too...thanks! Deb
ReplyDeleteSo adorable...you are awesome!
ReplyDeleteBree
Just wonderful...the shade is adorable...I wonder if you could buy them somewhere, anyone know?
ReplyDeleteGreat directions too!
Rondell
This is an AWESOME tutorial. AWESOME! Cannot imagine how much work it was. Love it!
ReplyDeleteLooks so cute - nice tutorial (they are very hard!)
ReplyDeleteExcellent.. now I'm going to give one a try for my kitchen back door! Thank you. Lx
ReplyDeleteThis is an AWESEOME tutorial! I'm terrible at them because I always forget to take a picture of a step, and then the whole thing is useless. The curtains are so cute. I love 'em. Great job! Thank you so much for sharing on my Friday link party! See you next week!
ReplyDeleteIt looks good! And not too intimidating... :) Visiting from Sunday Showcase.
ReplyDeleteSuch a great tutorial! I love your idea's and its very well explained, great job! We're getting ready to move and I'm gonna have quite a few little windows that would be perfect for this style shade. Thanks for the tutorial!
ReplyDeleteYour tutorial was awesome. I agree, they are hard to write. Some day I might try a video tutorial on something, it might be easier. Love this type of window covering, it is just classic and elegant. Saw this on Under the table and dreaming.
ReplyDeleteThis is just amazing!! Way to go, girly! I'm happy to be your newest follower of your delightful blog and would love to have you as a friend at Frou Frou Decor! I'd also like to invite you to link your wonderful creations up at my Fabulous Friday Finds party, each Friday! Hope to see you there!
ReplyDeleteHugs,
~Terrell @ Frou Frou Decor~
Thanks for the tutorial. I've always liked this kind of shade and really should make some for our hall - now I know how!
ReplyDeleteYour shade turned out perfect! You did a great job... and yes, tutorials aren't as easy as they look are they? I have tried a few myself.
ReplyDeleteOh Thank you so much for this! I am going to do a trial run before using my good fabric! I will post and link to you so you can check out my handiwork and get all the credit!! I adore your blog! Thanks so much :) !!!
ReplyDeleteOk-I did a trial run with an old sheet and some seam bonding as ribbon ties...not to shabby!! I will post a pic on my blog as soon as I get the magnetic curtain rod I need :) The only question I have would be:
ReplyDeleteWhen you are sewing in the ties, do you end up with just pressed open seams on the "outside facing" side of the curtain? Know what I mean? I can post pics later too on my blog to show you what I mean. But WOW so adorable! Thank you so much for this tutorial! LOVE!!
I posted my practice version! Thanks again!
ReplyDeletewww.cupcakesandrubyslippers.com
Becky :)
Thanks for posting, mine turned out really well. I would have liked to see a pic of the back of the finished product. Very easy with your instructions and tips.
ReplyDeleteJust wanted to compliment you on your diagrams. Very well done!
ReplyDeleteHow have I not seen these until now?? THANK YOU so much for posting this tutorial. These will be perfect for my girl's room. I'm so excited! Can't wait to measure their window so I can go shopping for material. Need them to wake up. Hehe! Thanks again.
ReplyDeleteSo adorable...you are awesome!
ReplyDeleteBree
Thank you for this tutorial; I made mine today and it was very easy thanks to you!
ReplyDeleteOh, here it is!!!! Voila. I love your blog sarah, its so detailed and so helpful and so beautiful. Once I'm done with my own, I dedicate this piece to you!
ReplyDeletehi! You are so right, tutorials are very hard to write. BUt you did a great job and I am so happy I found your blog with all these perfect ideas! I just bought a house and many of my projects are the same as the ones you have: shutters, lines in a room, roll up shades, etc. I can;t wait to get started on my projects.
ReplyDeleteThanks!
Carla
www.creativebitesblog.com
I love the simplicity and elegance all in one. I was trying to make my own roll up shade adn I was wondering what width ribbon you used - i looks very proportional. Thans! Mandi
ReplyDeleteHi,
ReplyDeleteThis is a great tutorial - thanks. I'm about to make one for my bedroom window, but it really needs to be lined (to keep the draft out). I was just wondering if you can see the back of the blind when it rolls up (which would mean that I have to buy a co-ordinating lining rather than using the cream I have knocking around).
Thanks so much,
Clare
I love how simple and chic they look. Not overwhelming like some colors and some styles.
ReplyDeleteThese are darling. Could you explain your comment about layering these with curtains? I'm would love to hear some examples of how to do that! Thank you! Judy
ReplyDeleteThanks for this tutorial - i have just made a blind for my kitchen from it! it looks fab and your directions were great. I really appreciate the time you took to write it - I wouldn't have had a clue without it.
ReplyDeletei made my blind out of linen voile which i wouldn't recommend - its like the teenager of fabrics! nightmare!
Perfect for my kitchen. Have my material...all I need now is the ribbon. I'll send a picture if all is successful.
ReplyDeleteThanks for this tutorial! I used it to make mine which I finally got around to finishing last week and posted about today. Love your blog! Will be checking back often :)
ReplyDeleteThis tutorial was a lifesaver! I started my own project without really knowing what I was doing and when it was turning for the worst I found cozy cottage cutie to save the day!
ReplyDeleteI was just about to start my project the same way . . . No clue! This is exactly what I was looking for.
DeleteAnyone have any luck making these lined? Would love to do them as blackout shades for my daughter's room...
ReplyDeleteWhen the curtain is down, do the ties just hang or do you tie them up somehow just to be a little more decorative?
ReplyDeleteI like your idea. It gave me ideas on how to elaborate on that design. I am making a tie up shade for my kitchen. Am going to alter your plan a bit as I want my shade/curtain to have a separate valance look to it. I will also be stenciling the valance with the same design I stenciled my kitchen with and also lining my shade for more of a sun block for hot summer days. Thanks for your design!
ReplyDelete