


 |
| Old windows are pretty. |
So I mentioned yesterday that we had an old window from our basement laundry room. Since old windows are another one of my mini obsessions, I knew I would keep it and turn it into something cute.
Here are a few pictures of the window before:
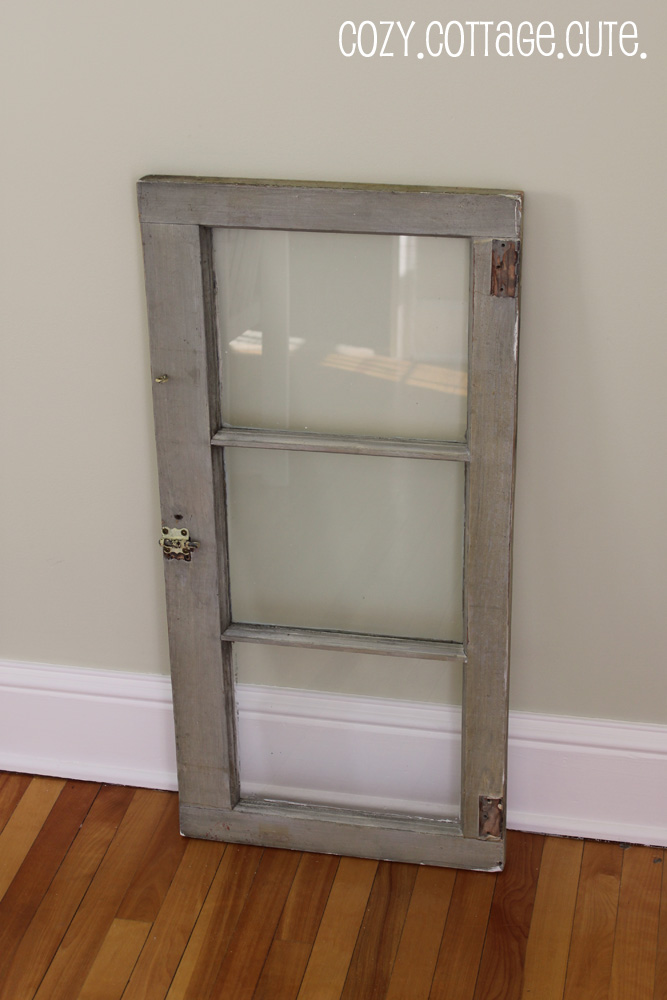

 |
| The window had a variety of paint on it already: blue, green, and yellow. |
The first thing I did was scrape off the putty that was holding the glass in place. I started with an exacto knife, moved onto an old kitchen knife, then moved onto a chisel and hammer. It was almost impossible to get off. It took forever.
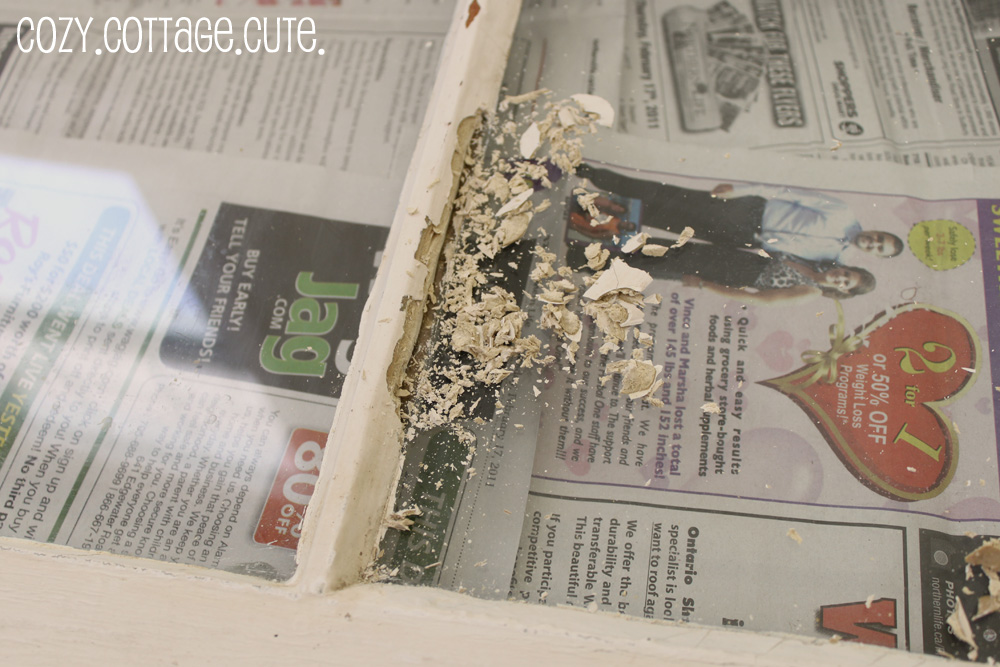 |
| Removing the putty. |
Once the first pane of glass was removed, I brought it into my local glass shop and had 3 identically sized mirrors cut. Three mirrors only cost $19.95.
 |
| Removing the first pane of glass. |
Once I had all three panes of glass removed, I filled a few small holes with wood filler.
 |
| All three panes of glass removed. |
I then gave the whole window a light sanding with fine-grit (150) sandpaper and an electric sander. I made sure to leave some blue/green paint on so that it would show through when I distressed the window later.
 |
| Lightly sanded and smooth. |
Next I primed the window with Fresh Start Primer from Benjamin Moore.
 |
| Primed. |
Once the primer dried I painted the whole window with two coats of white paint. I used some leftover Simply White from my last project.
 |
| Two coats of white paint. |
Once the paint was dry (I used my hairdryer for help) I once again sanded the whole window with an electric sander and 150-grit sandpaper. I took off quite a bit of paint so that I would see some of the window's character: the old paint finish and where the hinges were, etc.
 |
| Distressed all pretty-like. |
Next, I placed the mirrors face down into the window openings.
 |
| Getting ready to place the mirror in. |
I got some of these tiny clips while I was at the local glass shop. The lady at the cash gave them to me for free. People at local stores are nice.
 |
| Placing 4 clips on each mirror pane. |
I (actually Alex did this part) used a block of wood and a hammer to jam the clips into the wood.
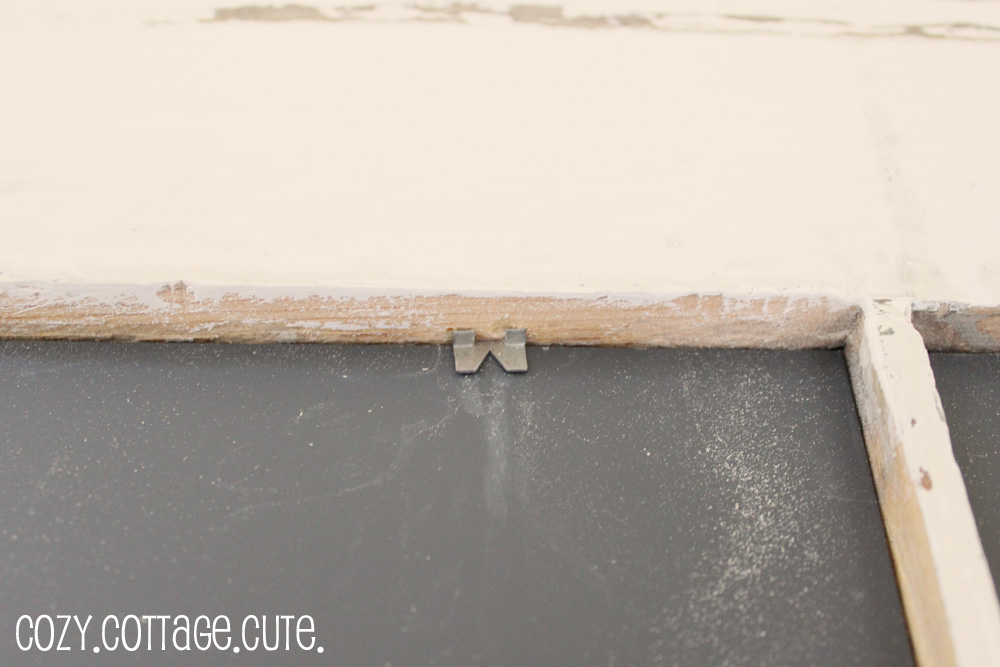 |
| Securing the mirror with clips. |
Once the mirrors were in I attached two heavy duty picture hangy things in each corner.
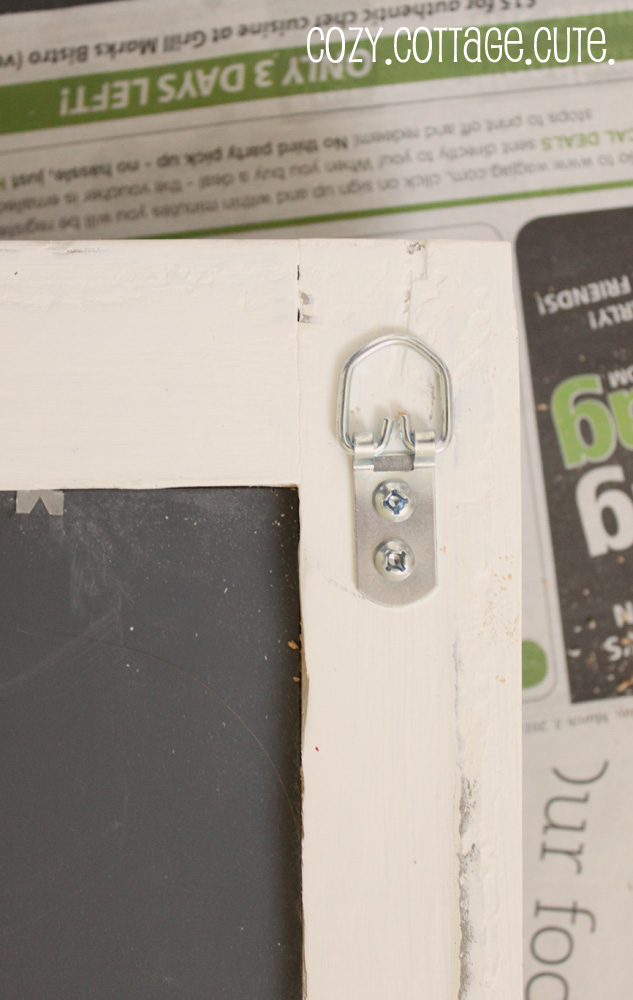 |
| Adding hangy thingies. |
For the finishing touch, I purchased five oil-rubbed bronze decorative hooks to add to the bottom of the window. I spaced them out first, marked them, and then pre-drilled some holes.
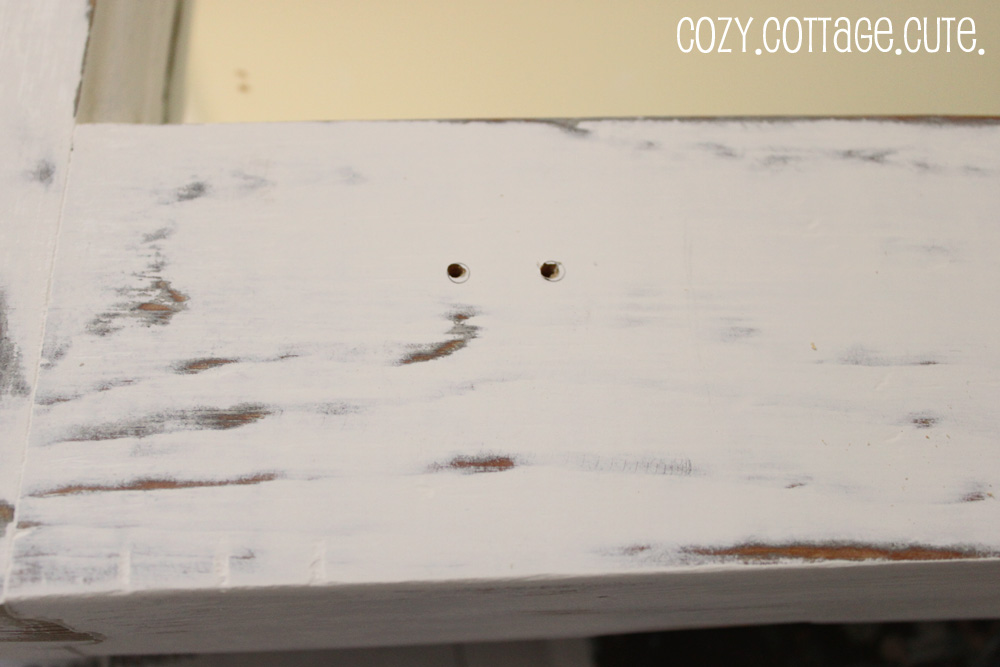 |
| Marking the spots for the hooks. |
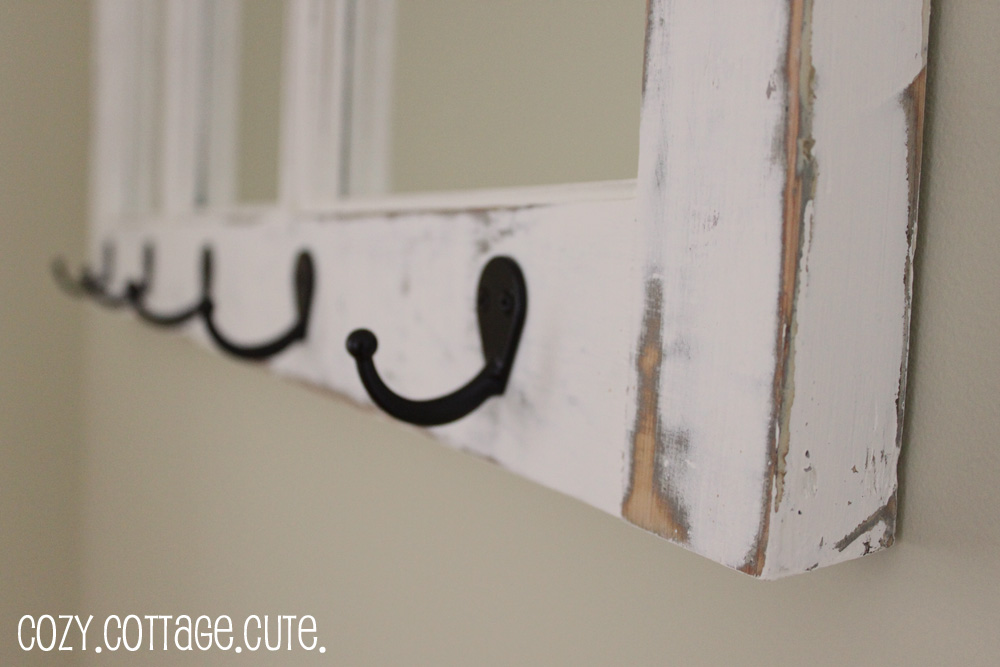
I screwed in the hooks by hand with a screwdriver.

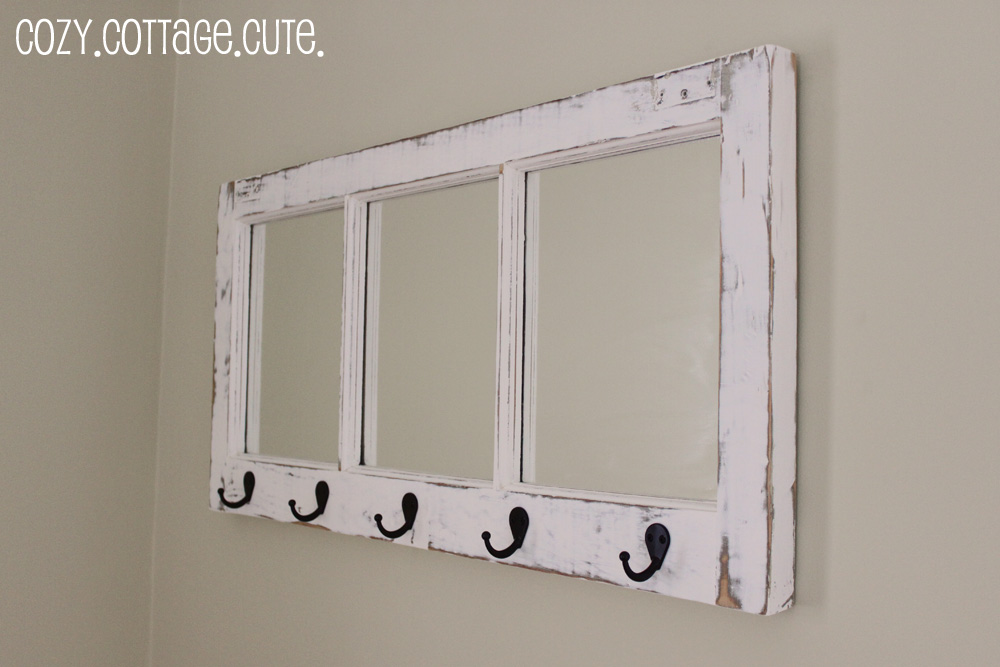
Finally, we hung it up (securely with some big anchors and screws) by the door in the breakfast room.
 |
| Ta-da! |
 |
| Can you see the blue/green showing through? |
 |
| Can't wait to hang something up there! |
 |
| Oh yes. I like it. |
My pictures were getting a bit fuzzy by the end since it was getting late in the day when we were finishing up but I was determined to get this project done today. I wouldn't have been able to do it without Alex's help since he took an emergency trip back to the hardware store before they closed at 5:00 since I bought two pewter hooks by accident and needed to exchange them.
And here is the final before and after shot:

I'll be sharing this project at these lovely places:
Sunday Showcase Party @ Under the Table and Dreaming, Week-End Wrap-Up Party @ Tatertots and Jello, Show Off Your Cottage Monday @ The House in the Roses, DIY Project Parade @ The DIY Show-Off, Amaze Me Monday @ Dittle Dattle, Making Monday Marvelous @ C.r.a.f.t., Metamorphosis Monday @ Between Naps on the Porch, Nifty Thrifty Tuesdays @ Coastal Charm, Tutorials and Tips Tuesday @ Home Stories A to Z, Tutorial Tuesday @ Hope Studios, Good Life Wednesday @ A Beach Cottage, Power of Paint Party @ Domestically Speaking, Transformation Thursday @ The Shabby Chic Cottage, How-To Tuesday @ The Lettered Cottage, Saturday Nite Special @ Funky Junk Interiors


Oh, I love this! Looks fantastic!
ReplyDeleteS
xo
Love it! looks Great!
ReplyDeleteAs always you did a great job!! We found a few old windows in the old house that is now our BnB building. I painted them up and put mirrors in them and they are a nice addition to the bedrooms. www.thatcountryplace.com is our BnB site. :) Have a great evening.
ReplyDeleteI love old windows too. What a great use!
ReplyDeleteSarah that turned out so beautiful! I love the color and yes I can see the blue/green showing through. I love the mirror idea as well!
ReplyDeleteI hope that you have a wonderful Monday!
This is adorable, I too have an obsession with old window panes and am always looking for creative ways to use them in my decor!
ReplyDeleteI am visiting from dittle dattle
katieshowto.blogspot.com
Totally worth the $20, that's a frugal find for sure. And mirrors make all the difference! (I just posted the "Eagan" PB mirror.) Now what to hang on those yummy hooks????
ReplyDeleteIt's lovely!
ReplyDeleteLove it!
ReplyDeleteLove that distressed window, love the hooks - great job!
ReplyDeleteWonderful job. I have an old window I have been trying to decide what to do with. I think this is just the project I need. Thanks for sharing. ~~Sherry~~
ReplyDeleteI have the honor of being your "linky neighbor" over at Met Monday, stopping by to say your window is just darling! You did a wonderful job. Perfectly distressed! Have a wonderful week, xoxo tami
ReplyDeletethis could not be cuter!!!
ReplyDeleteToooo cute! Love this idea! You did a great job and the distressing is perfect! Happy MM!
ReplyDeletexoxo laurie
So cute! Can't wait to see what you come up with to hang from the hooks!!
ReplyDeleteLooks fantastic! Who knew getting mirrors cut was so cheap!
ReplyDeleteWow, Sarah! That looks fantastic!
ReplyDeleteGorgeous as always! You do great work girl!! It looks fantastic!
ReplyDeleteIt looks wonderful; you did a great job. I am going to have to start looking around for some old windows.
ReplyDeleteSaw this on Dittle Dattle's Amaze Me Monday! I love this!! You did a great job!!
ReplyDeleteHugs ~~ Suz
www.inspiringcreativeness.blogspot.com
Great project. You did a great job on the distressing.
ReplyDeleteI love this project! I'm your newest follower (right after I post this comment). Great tutorial.
ReplyDeleteVery cute!
ReplyDeleteLOVE the new "window"!!!!!
ReplyDeleteNancy
VERY CUTE GREAT JOB. LOVE THE MIRROR BEHIND
ReplyDeleteThe window looks great, you did the perfect amount of distressing. hmmmm..... maybe I should bring in the 2 old windows I have hanging on my fence. You've got me thinking!!
ReplyDeleteI love it! It looks so fantastics.
ReplyDeleteBye Vlaďka
OOh AAh I like... You are too clever.
ReplyDeleteThanks for the inspiration.
Donna xx
Lovely transformation! Where do you find mirrors that would fit any size opening and can you get them cut just like glass at a hardware store?
ReplyDeleteCindy
Wow Sarah! You did a fantastic job! It really turned out great!
ReplyDeleteOh, Sarah! I absolutely love it!! I knew you would make it look adorable! :)
ReplyDeleteBeth.
What a great metamorphosis! Well done.
ReplyDeleteI am having a hilarious Linky party with prizes this Wednesday. Details are on my blog today.
I hope you'll join in on the fun.
Love!
ReplyDeletehttp://lanis-hammertime.blogspot.com/
Love this! So cute!
ReplyDeleteNow that is cute!!!!
ReplyDeleteCan I have it?? :)
Thanks for the step by step...it looks great!
ReplyDeleteI love this! I'm getting ready to redo my mudroom, great solution.
ReplyDeleteI love this idea! I found your blog at the DIY Showoff. You have such great ideas and I'm your newest follower! I'd love it if you'd follow me back: http://stillwaterstory.blogspot.com/
ReplyDeleteAgain, you did a fantastic job with this!! :-)
I, too, love this ... great vision! Truly a great way to repurpose the window! Thanks for sharing this inspiration ... I'm a new follower. *Becca*
ReplyDeletewww.adventuresindecorating1.blogspot.com
Looks cute. I like the addition of the coat hangers.
ReplyDeleteSo darn cute...I'm a huge fan of OLD windows! Thanks for coming to my party.
ReplyDeleteBlessings,
Linda
Wow, you did an awesome job!
ReplyDeleteWhat a great use for the window. Looks good.
ReplyDeleteI love this project. I'm featuring you today on www.illgetyoumypretties.blogspot.com!
ReplyDelete:) Kristy
Super cute! Your window is perfectly distressed and I love the bits of blue green showing through :)
ReplyDeleteWow I love it! It's beautiful!
ReplyDeleteWOW that window looks great! You really did a good job. Thanks for sharing, Vicky
ReplyDeleteWhat a transformation! I love what you did with the window. Too bad I don't have any old windows lying around!
ReplyDeleteNice!!!! LOVE IT!! As soon as I saw it I was thinking that it would look good in your breakfast room! Looks great Sarah!!! Ummm today is Tuesday!.... Friday is..... 2 days AWAY!! getting excited for you!!
ReplyDeleteThis is wonderful! It looks like something you'd find in a great store that would cost more than the $19.95 plus paint and accessories - Love the results. Do you have plans for the window panes and are they the wavy kind?
ReplyDeleteJust curious!
:)
Kathy
I just love old window frames! Your project turned out really cute!
ReplyDeleteReally great idea! Those little hooks to hold the mirror are an easy way to keep the mirror in place I'll have to remember that!
ReplyDeleteI love this -old, chippy and functional!
ReplyDeleteWonderful! I love it!
ReplyDeleteSO pretty! I also have an obsession with old windows. They are so pretty and full of character. It was a great idea to just install mirrors instead of the glass! I've seen people use the Krylon mirror-like spray paint on glass windows, but it has more of an antique-mirror look.
ReplyDeleteCUTE!!! I just LOVE this! We've got a great 'junk yard' down the road that has some great looking old windows sitting outside all forlorn looking. Now I know what to do with them, so I'm gonna go check them out!
ReplyDeletehttp://thisiswhatilove-carmen.blogspot.com/
This is fantastic...hope to see you over at My Dream Canvas.
ReplyDeleteIt turned out really cute. Love the addition of the hooks. Makes it very functional and cute!
ReplyDeleteLove love love this!!!
ReplyDeleteGorgeous! I ABSOLUTELY love it!
ReplyDeleteHi Darah!
ReplyDeleteLove what you transformed this window into...so cute!
We have these types of windows too ..I saw them in the shed in the summer and had my hubby tke them out and Ive since hung a few..love them!
Mine are white too.
Don't you just love the "old" shabby look to them?!
Looking forward to getting to know you...super cute blog you have!!
Come and visit :)
Deborah :)
Love its super shabbylisciousness!
ReplyDeleteWhat a great idea! I have the same shape three-paned window out int eh garage (found it at the dump) and now I know exactly what I'm going to do with it!
ReplyDeleteCheryl at My Sister's Cottage
found this from Shabby Chic Cottage... LOVE it!
ReplyDeleteI love what you did with this window. I'm a huge fan of old windows too. I had some on my blog a few weeks ago. Love your blog as well...
ReplyDeleteplease visit and follow along with my blog...I started up in February and have tons of ideas...I'd think you will like it....
thanks, Mariaelena
Because I'm lazy I would have kept the original colour of the frame and stuck the mirrors in, it still would have looked good LOL but what you did looks great too!
ReplyDeleteGreat job! I love it!
ReplyDeleteSo cute! Thanks for sharing!
ReplyDeleteBecause I'm lazy I would have kept the original colour of the frame and stuck the mirrors in, it still would have looked good LOL but what you did looks great too!
ReplyDeletefound this from Shabby Chic Cottage... LOVE it!
ReplyDeleteCUTE!!! I just LOVE this! We've got a great 'junk yard' down the road that has some great looking old windows sitting outside all forlorn looking. Now I know what to do with them, so I'm gonna go check them out!
ReplyDeletehttp://thisiswhatilove-carmen.blogspot.com/
Hi Darah!
ReplyDeleteLove what you transformed this window into...so cute!
We have these types of windows too ..I saw them in the shed in the summer and had my hubby tke them out and Ive since hung a few..love them!
Mine are white too.
Don't you just love the "old" shabby look to them?!
Looking forward to getting to know you...super cute blog you have!!
Come and visit :)
Deborah :)
Super cute! Your window is perfectly distressed and I love the bits of blue green showing through :)
ReplyDeleteI love this! I'm getting ready to redo my mudroom, great solution.
ReplyDeleteNow that is cute!!!!
ReplyDeleteCan I have it?? :)
OOh AAh I like... You are too clever.
ReplyDeleteThanks for the inspiration.
Donna xx
VERY CUTE GREAT JOB. LOVE THE MIRROR BEHIND
ReplyDeleteVery cute!
ReplyDeleteI love this project! I'm your newest follower (right after I post this comment). Great tutorial.
ReplyDeleteIt looks wonderful; you did a great job. I am going to have to start looking around for some old windows.
ReplyDeleteSo cute! Can't wait to see what you come up with to hang from the hooks!!
ReplyDeleteI have the honor of being your "linky neighbor" over at Met Monday, stopping by to say your window is just darling! You did a wonderful job. Perfectly distressed! Have a wonderful week, xoxo tami
ReplyDeleteTotally worth the $20, that's a frugal find for sure. And mirrors make all the difference! (I just posted the "Eagan" PB mirror.) Now what to hang on those yummy hooks????
ReplyDeleteLove it! looks Great!
ReplyDeleteI just saw this on Homestories linkup and how cool! I love it! I might have to find an old window :)
ReplyDeleteYou did a great job! I love repurposing too. Love all your pictures showing the process-would love to try something like this someday :)
ReplyDeleteYou totally inspired me! My husband and I had our old shed torn down and bought a new one. I had him save the window from it bc I knew I wanted to do something with it. Thanks to Pinterest I found you and your wonderful projects! I just finished the window today and I'm in love :)
ReplyDeleteThat's awesome! Although I do have to warn you that now you're going to want to do it to every single old window you ever see!
Delete:)
I have a question about this that might sound really silly but I have an old window that I want to add hooks too but I'm worried that I'm going to crack the glass if I drill into the frame of it. What do you think?
ReplyDeleteThe glass usually isn't set directly into the wood, it's usually just resting on a little ledge of wood with putty holding it into place.
DeleteI think if you place your window onto something soft (folded blanket) while you drill to keep the glass from rattling it will be just fine!
We had no issues at all when we added the hook to ours and I'm pretty sure we just rested the window on the hardwood floor.
:)
Good luck!
That was a great idea. I would of never have thought of taking a old door and turning it into a coat hanger. What I love about it as a coat hanger is that it still has it's windows. That's part of what makes it so artistic and unique.
ReplyDeleteLove it!! I did something similar...like you it took forever to get the putty off,i threw on some paint remover and let it sit for a bit,it made it a bit easier to remove the putty...as a result i think i wound up with early onset arthiritis....lol
ReplyDeleteCan you please share the paint colour of the wall that the mirror is hung on? I came across this page/site when trying to refinish an old window (thanks! It's been helpful) but I have really taken a liking to the paint colour and can't seem to match it. Thanks in advance!
ReplyDeleteBefore I share the paint colour I just want to let you know that the colour is a bit brighter in person than it appears in the above photos!
DeleteThe colour is called Seagrass and it was from the Sarah Richardson Collection, Para Paints at Lowes. I hope that helps!
:)
Thank you SO much :)
DeleteThat is SO cute! I just discovered old windows so I have a question. Did you put anything on it when it was done? Like a poly or anything? I have one old window that has chipped paint, but I like it and thought I'd just leave it as is, but don't want it to keep chipping. You know? What can I use? I've never really done anything except painted an old bed frame once. Thanks! Loving this blog!!
ReplyDeleteHi Kelly, at the time, I didn't seal the mirror because it didn't really get much use so I wasn't concerned about chipping paint.
DeleteThis blog post is great to reference before you work on old stuff. http://missmustardseed.com/2010/08/safety-first/
Good luck! :)
I love yur project!! Could u tell me the measurements of the window...?just to have a ruff idea of what I would like my husband to look out for.Thanks,and again great idea!!!
ReplyDeleteI will measure it tomorrow (I'm in bed, lol) and make sure to reply to your comment again with some measurements tomorrow! :)
DeleteSorry for the delay! The mirror was an old basement window and the size is roughly 34" x 17".
Delete:)